A quick tour of the screen
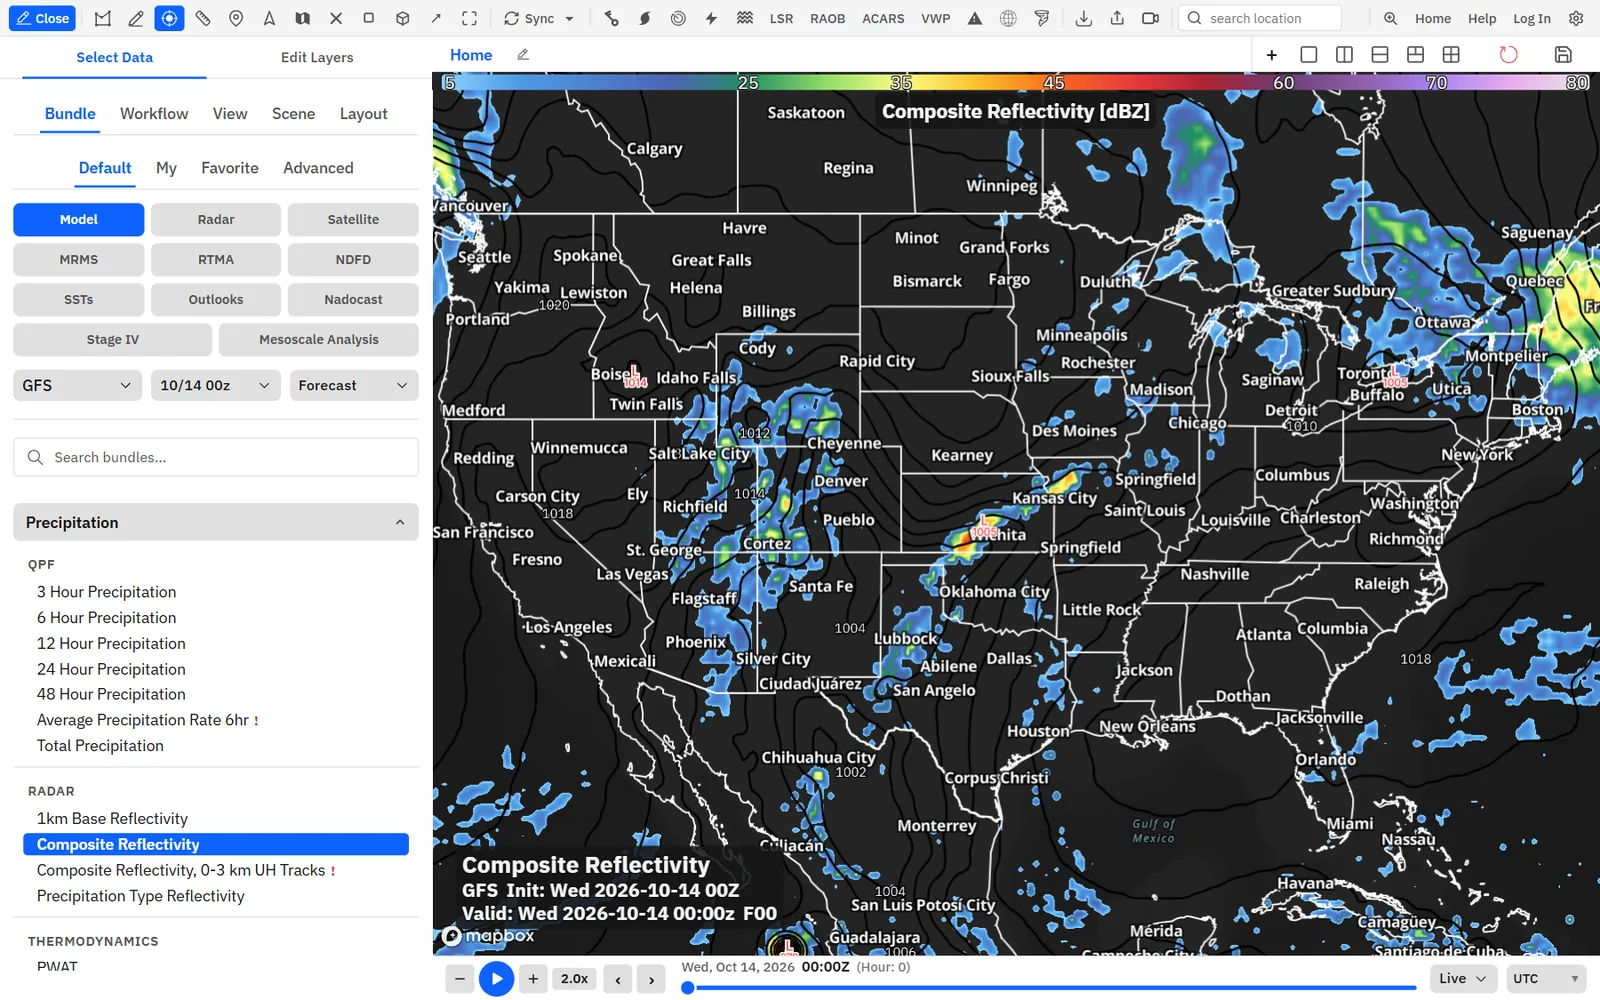
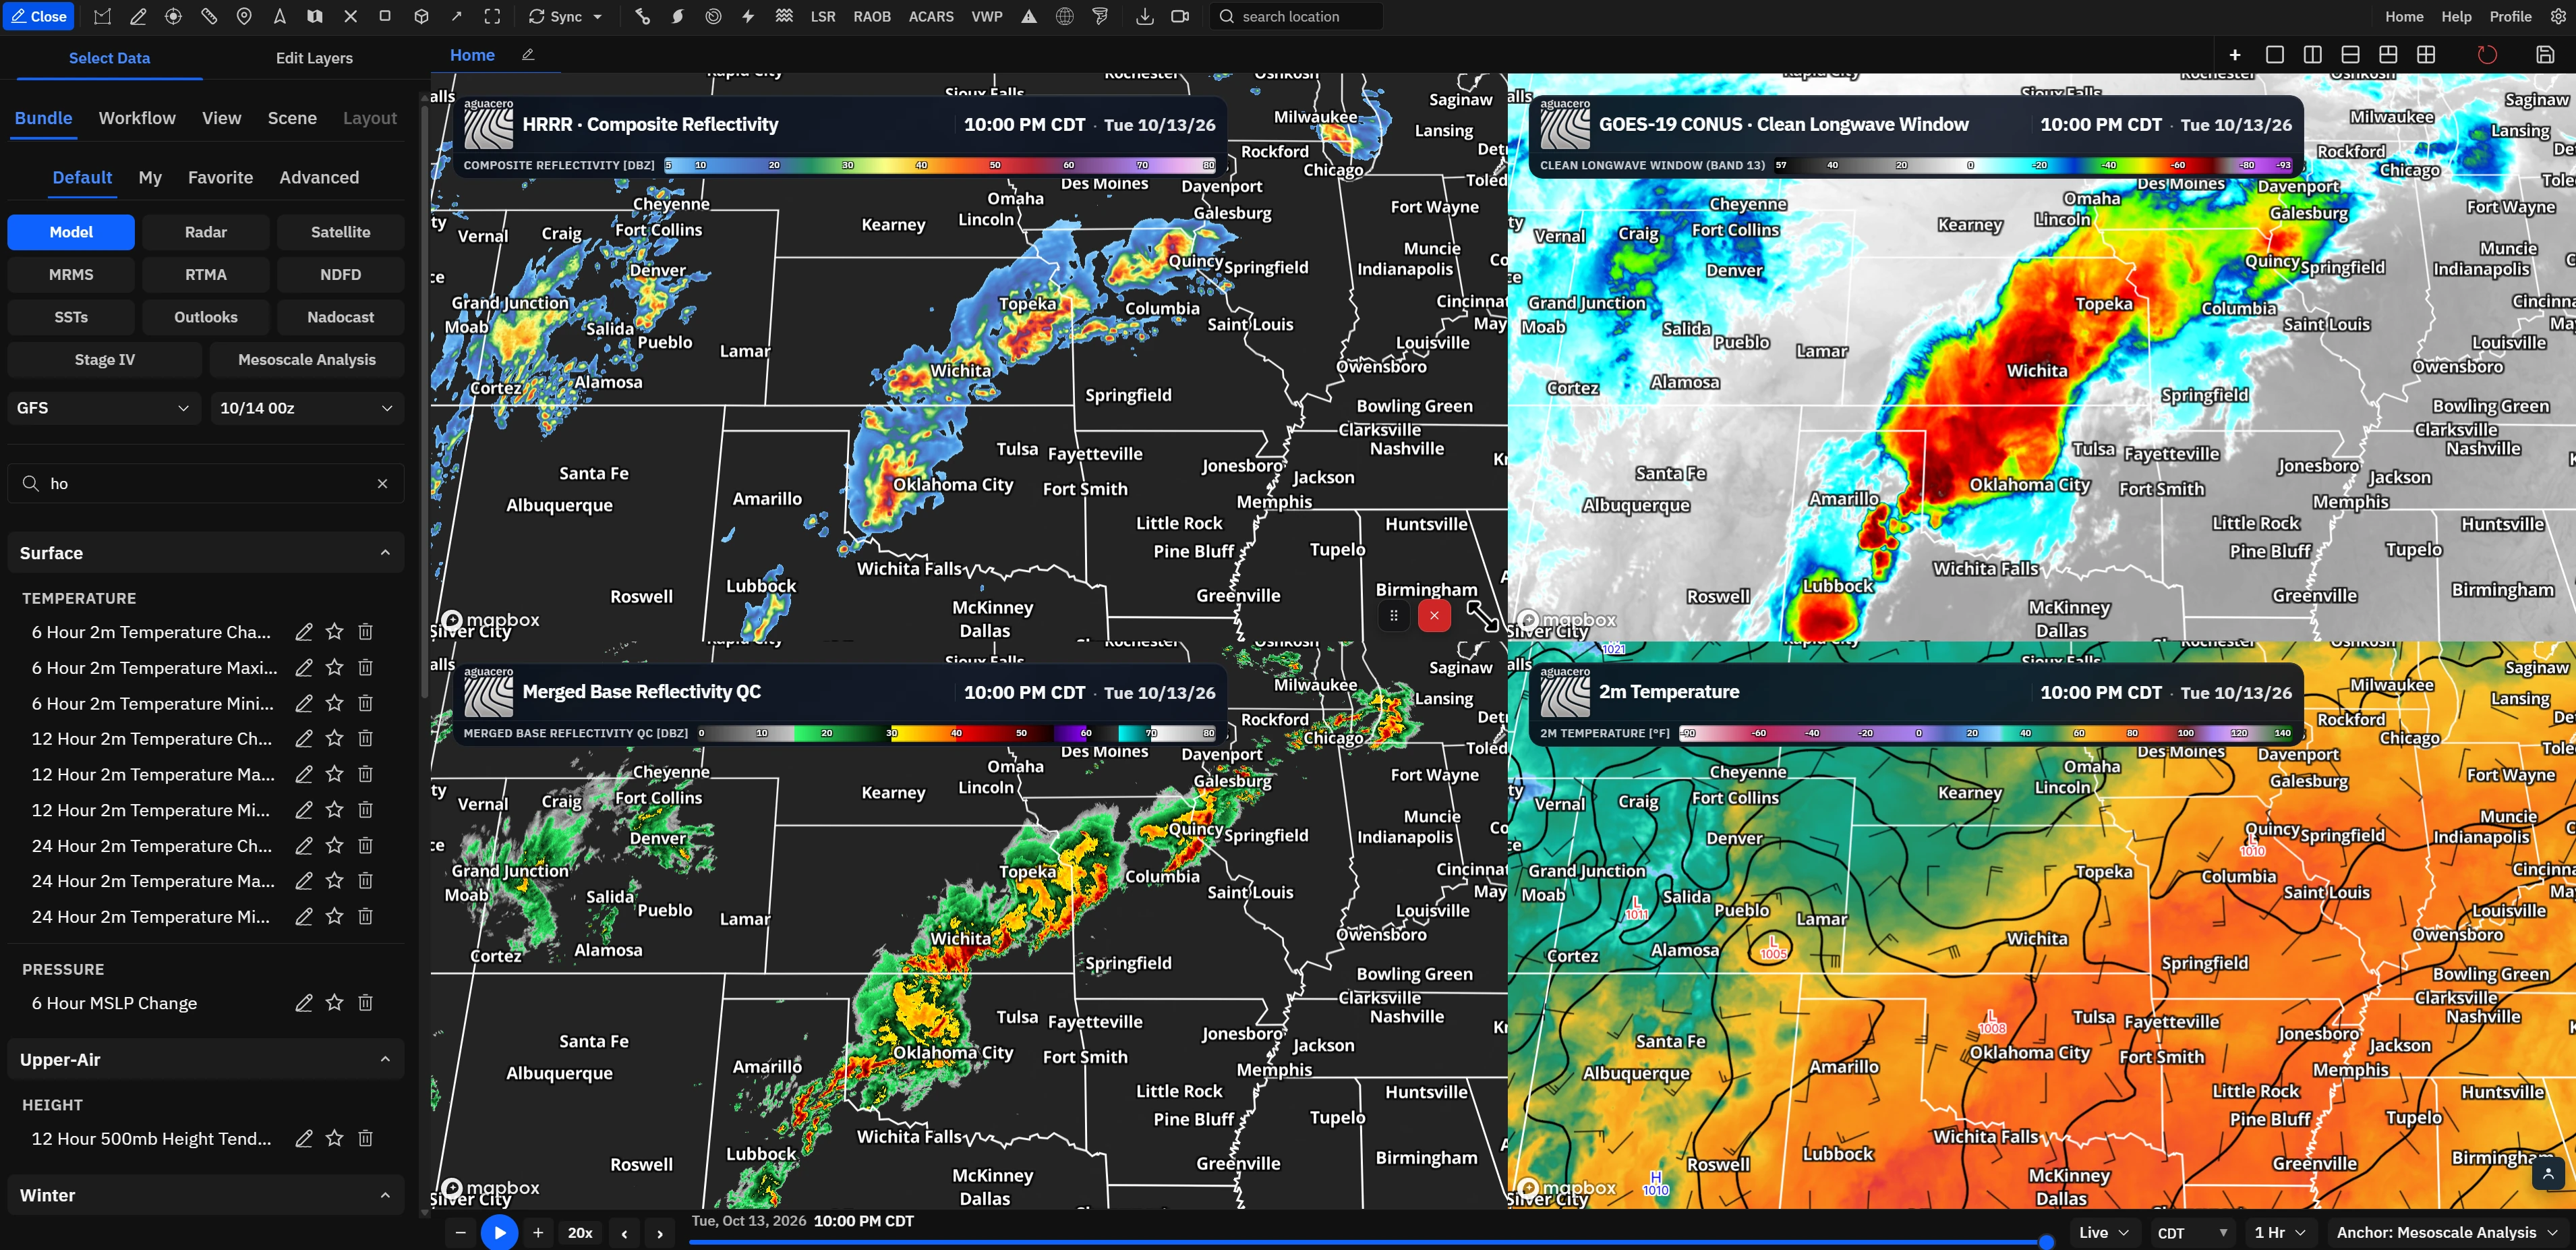
Know where the main controls are before you start: the toolbar, the sidebar, the map panels, the board tabs and the time bar.
- Use the toolbar along the top for tools, overlays such as alerts and lightning, exports and sync.
- Use the sidebar on the left to choose data. Select Data loads bundles and workflows; Edit Layers changes the layers on the map. Press F1 to open or close it.
- Work in the map panels in the middle. Click a panel to make it the active one.
- Switch boards with the tabs above the maps. The icons beside them split the board into panels.
- Use the time bar at the bottom to play, step and scrub through time.
- Find Help and Settings at the right end of the toolbar.
Shortcuts
- F1
- Open or close the sidebar
- Space
- Play or pause time
- , / .
- Step time back or forward
Synced panels
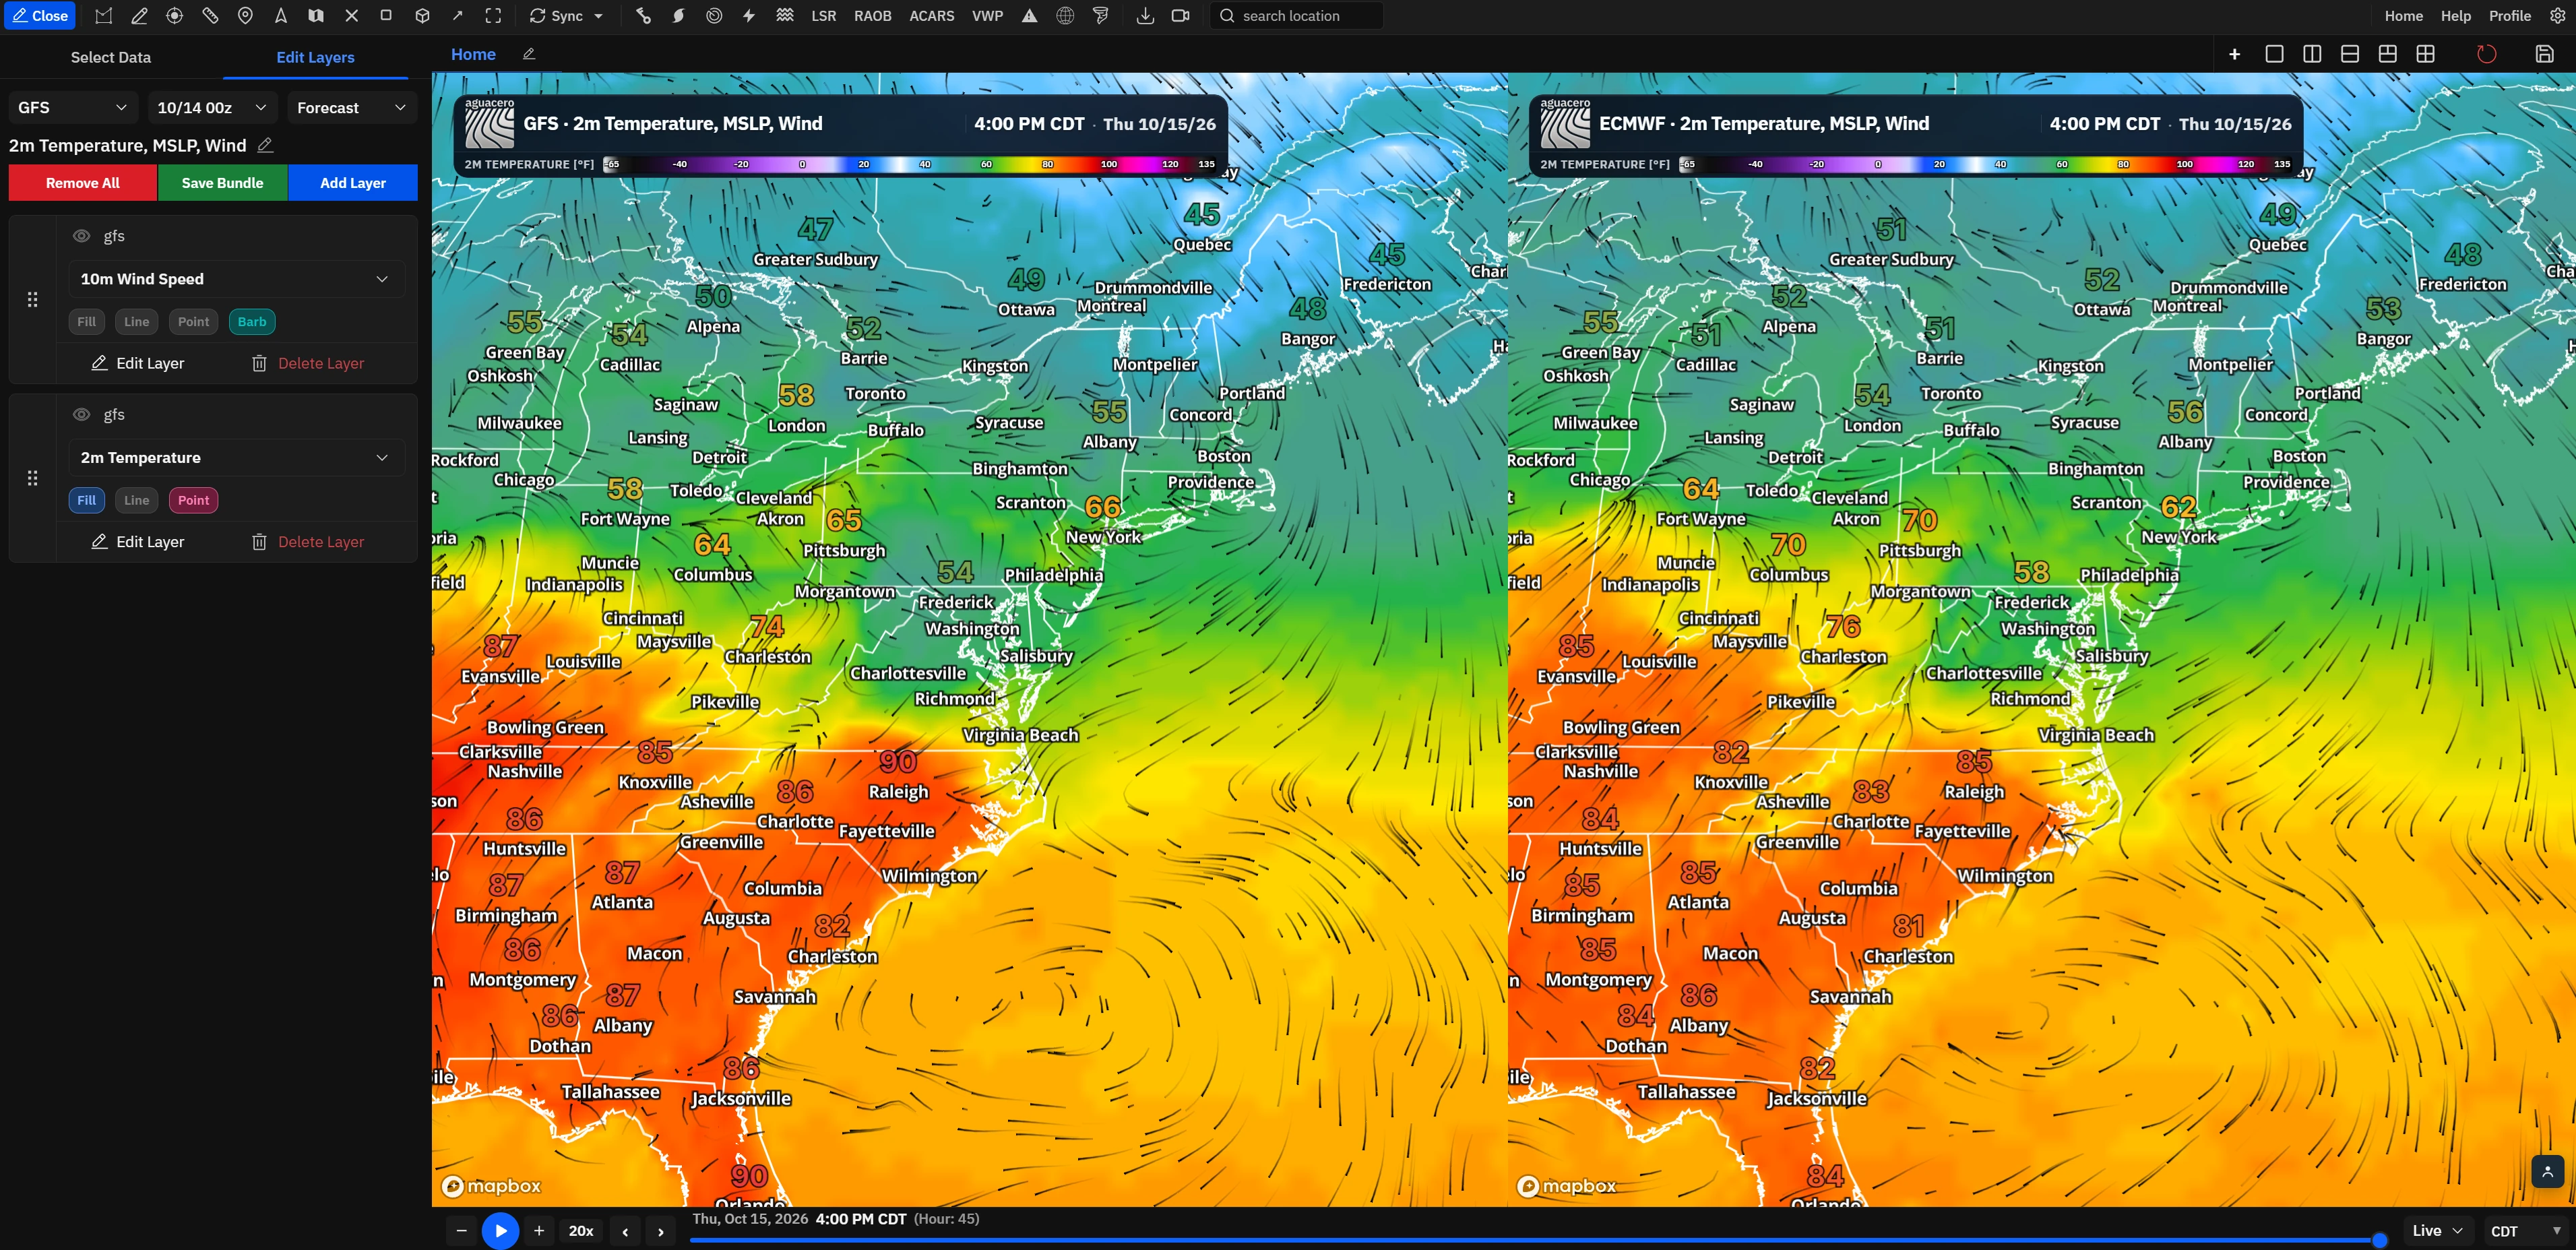
Split a board into several maps that share time, pan and zoom, each with its own bundle.
Show me in the app- Click a layout icon next to the board tabs, such as Split into two vertical panels or Four panel grid.
- Click a panel to make it active.
- Load a bundle from Select Data. It goes on the active panel.
- Hover a panel to show its controls at the lower right. Drag the grip to move it, drag the corner to resize it, or click the X to remove it.
Tips
- If a resized panel leaves empty space, hover the gap and click Add New Panel.
Free has 1 panel and Enthusiast 2. Professional can use the three- and four-panel layouts and add more panels.
Bundles
Save the layers, styles and model on a panel as a bundle, and reopen it in one click.
Show me in the app- Open the sidebar with Edit on the toolbar, or press F1.
- On Select Data, click Bundle.
- Click a bundle to load it on the active panel.
- Switch to Edit Layers to change it.
- Click Save Bundle, fill in Name, Category and Subcategory, then click Upload Bundle.
Tips
- Default bundles are starting points. Load one, change it, and save it as your own.
- Tick Overwrite existing bundle? to update a bundle you saved before. Other options save the map view or always open a set model or NEXRAD site.
- Right-click a bundle and choose Set as default start view to load it when the app opens.
Sign in to save bundles. Free saves 1, Enthusiast 10 and Professional unlimited.
Bundle editor
Add, reorder and restyle the layers on a panel, and search every model for the field you need.
Show me in the app- In the sidebar, click Edit Layers.
- Click Add Layer and type in Search variables..., or browse the menus.
- Drag the handle on the left of a row to change the draw order. Higher rows draw on top.
- Click the eye to hide a layer without removing it.
- Click the layer’s name to swap it for another field.
- Click Edit Layer to style it, or Delete Layer to remove it.
Tips
- Change the model and run in the sidebar. Green, yellow and red dots show whether each model has all, some or none of the bundle’s layers. The left and right bracket keys step to the previous or next run.
- Remove All clears every layer. Shift + click skips the confirmation.
Library
Browse default and personal bundles and workflows, search them, mark favorites and sort them into your own categories.
Show me in the app- On Select Data, click Bundle or Workflow.
- Choose a list: Default, My, Favorite or Advanced.
- Type in the search box to narrow the list, or pick a data type such as All.
- Click the star on a row to add it to Favorite.
- Drag a category header to reorder it, or double-click it to rename it.
Tips
- Advanced filters bundles by name or by the layers they contain.
- Leave Private Bundle? unticked when you save, then right-click the bundle and choose Copy bundle link to share it.
- Settings → Library sets which list and tab open first.
WorkflowsProfessional
Save every board, panel and bundle as one workflow, and bring the whole layout back in one click.
Show me in the app- Set up your boards and panels with the bundles you want.
- Click the save icon at the top right of the board to open Save Workflow.
- Fill in Name, Category and Subcategory.
- Choose options such as Private Workflow? or Open this workflow automatically when I sign in.
- Click Save Workflow.
- To load it, open Select Data, click Workflow and click its name.
Tips
- The circular arrow next to the save icon resets every board and panel to the defaults. Unsaved work is lost.
BoardsProfessional
Keep separate layouts on tabs, one for each part of the job, and switch between them.
Show me in the app- Click + next to the board tabs to add a board.
- Click the pencil on the active tab to rename it.
- Drag a tab to change the order.
- Click the trash icon on a tab to delete that board.
Sync
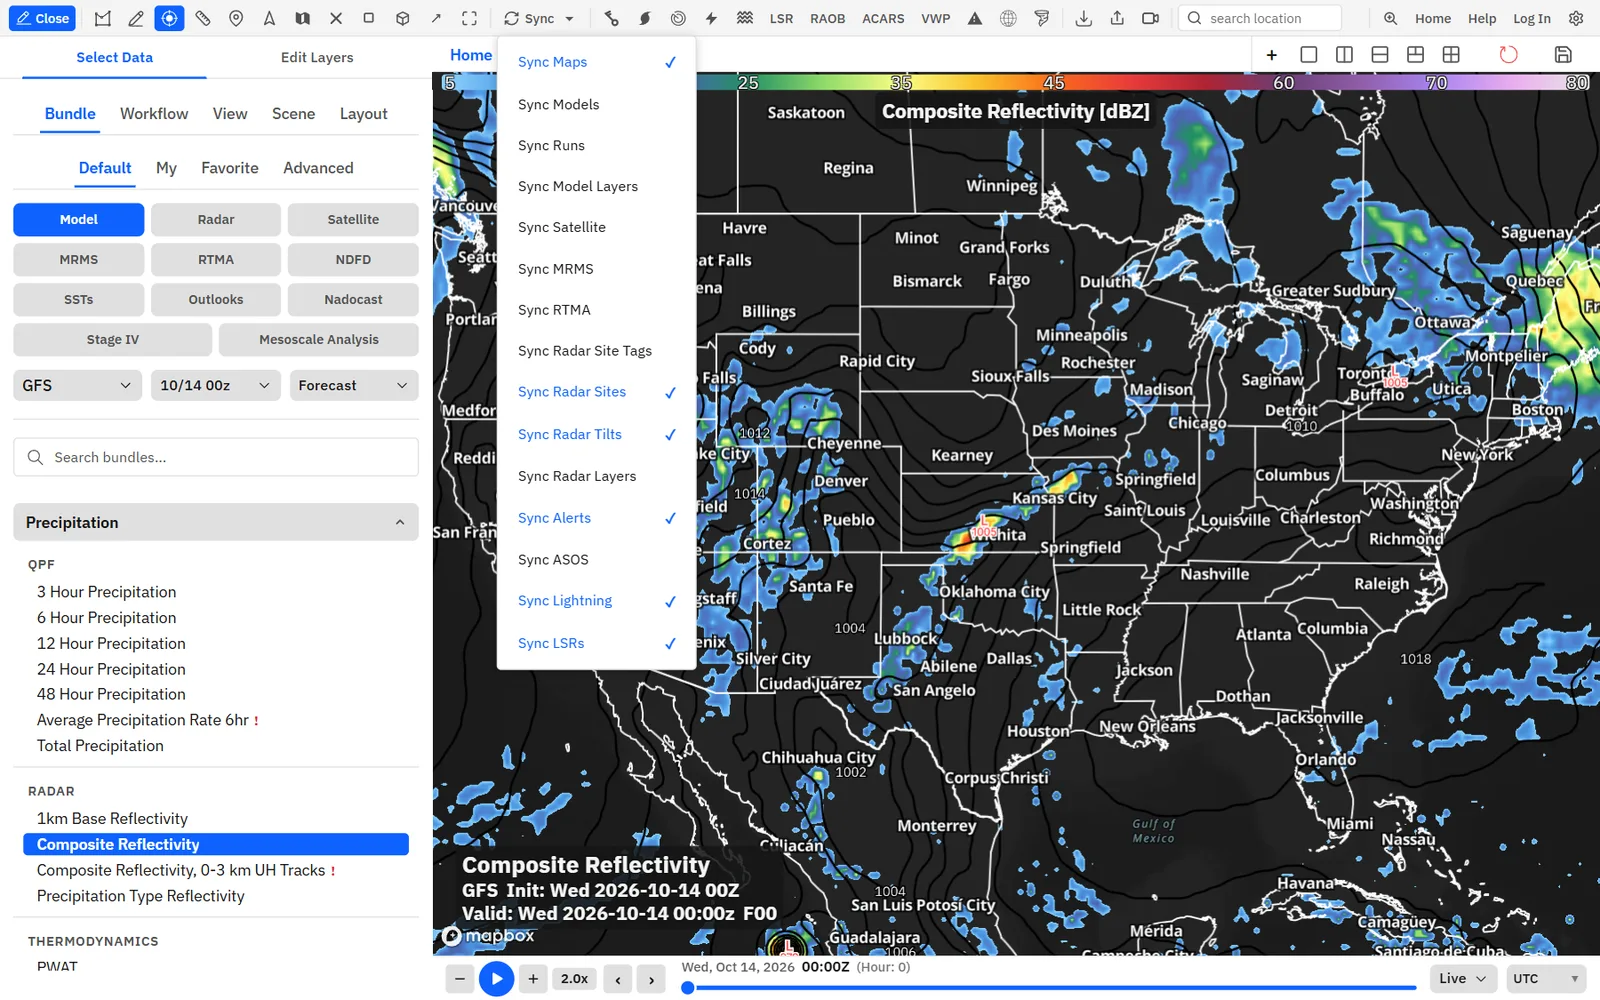
Choose what stays the same across the panels on a board: the map view, models, runs, layers, radar sites and more.
Show me in the app- Click Sync on the toolbar.
- Click an item to turn it on or off, such as Sync Maps, Sync Models, Sync Runs or Sync Radar Sites. A check mark shows what is on.
- Click outside the menu to close it.
Tips
- Settings → Sync has the same choices.
- Click the search location box on the toolbar.
- Type a city, zip code, airport code or radar site.
- Click a match, or use the arrow keys and press Enter.
Tips
- With Sync Maps on, every panel on the board flies to the place.
Globe and polar projections
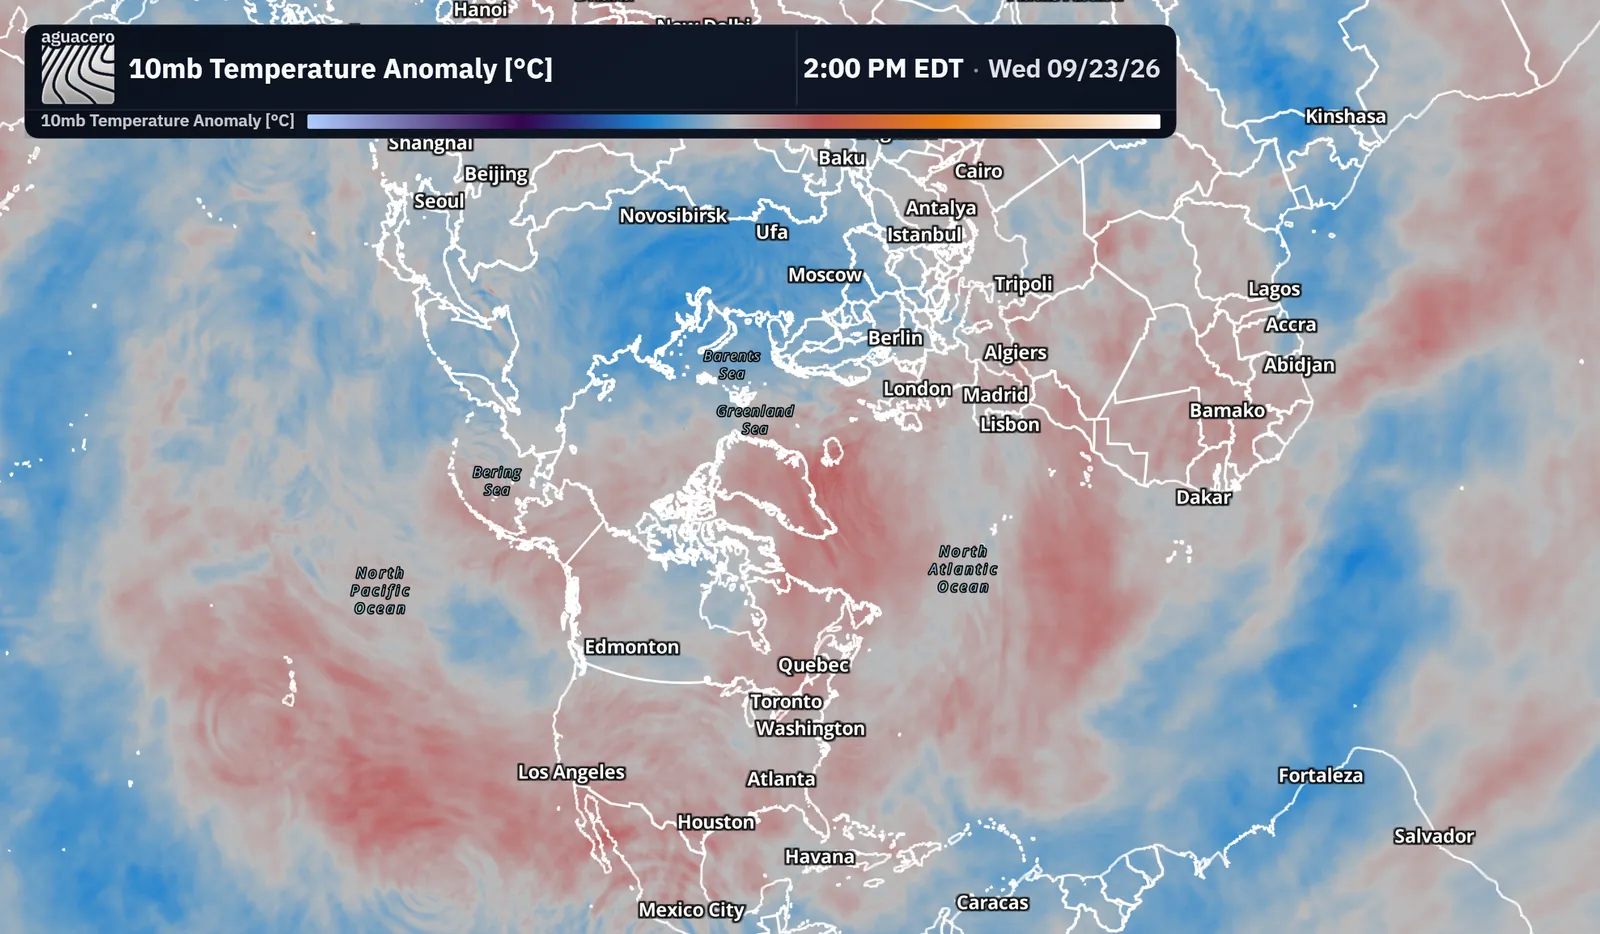
Show the map flat, as a globe, or as a north or south polar chart.
Show me in the app- Click the Map style button on the toolbar.
- On the Customize tab, find the projection buttons under the basemaps.
- Click Mercator, Globe, Polar NH or Polar SH.
Tips
- You can bind a key to Toggle map projection in Settings → Keyboard shortcuts.
- Click Map full screen on the toolbar, or press F11.
- Press Esc or F11 to bring the workspace back.
- To choose the mode, open Settings → Appearance and set Full screen to Browser or Map only.
Shortcuts
- F11
- Turn map full screen on or off
- Esc
- Leave map full screen
Pop-out controlsProfessional
Move the toolbar, sidebar and time bar into their own window, so the main window can show only the map on another screen.
Show me in the app- Click Settings on the toolbar, then Appearance.
- Turn on Pop out controls. The controls open in a separate window.
- Drag that window to another screen.
- In the controls window, use Select Data, Edit Layers and Archive to show or hide those cards.
- Click Workspace to pick a grid, then name and Save the arrangement.
Tips
- In a browser, allow pop-ups for the site if no window appears.
Shortcuts, toolbar and right-click menu
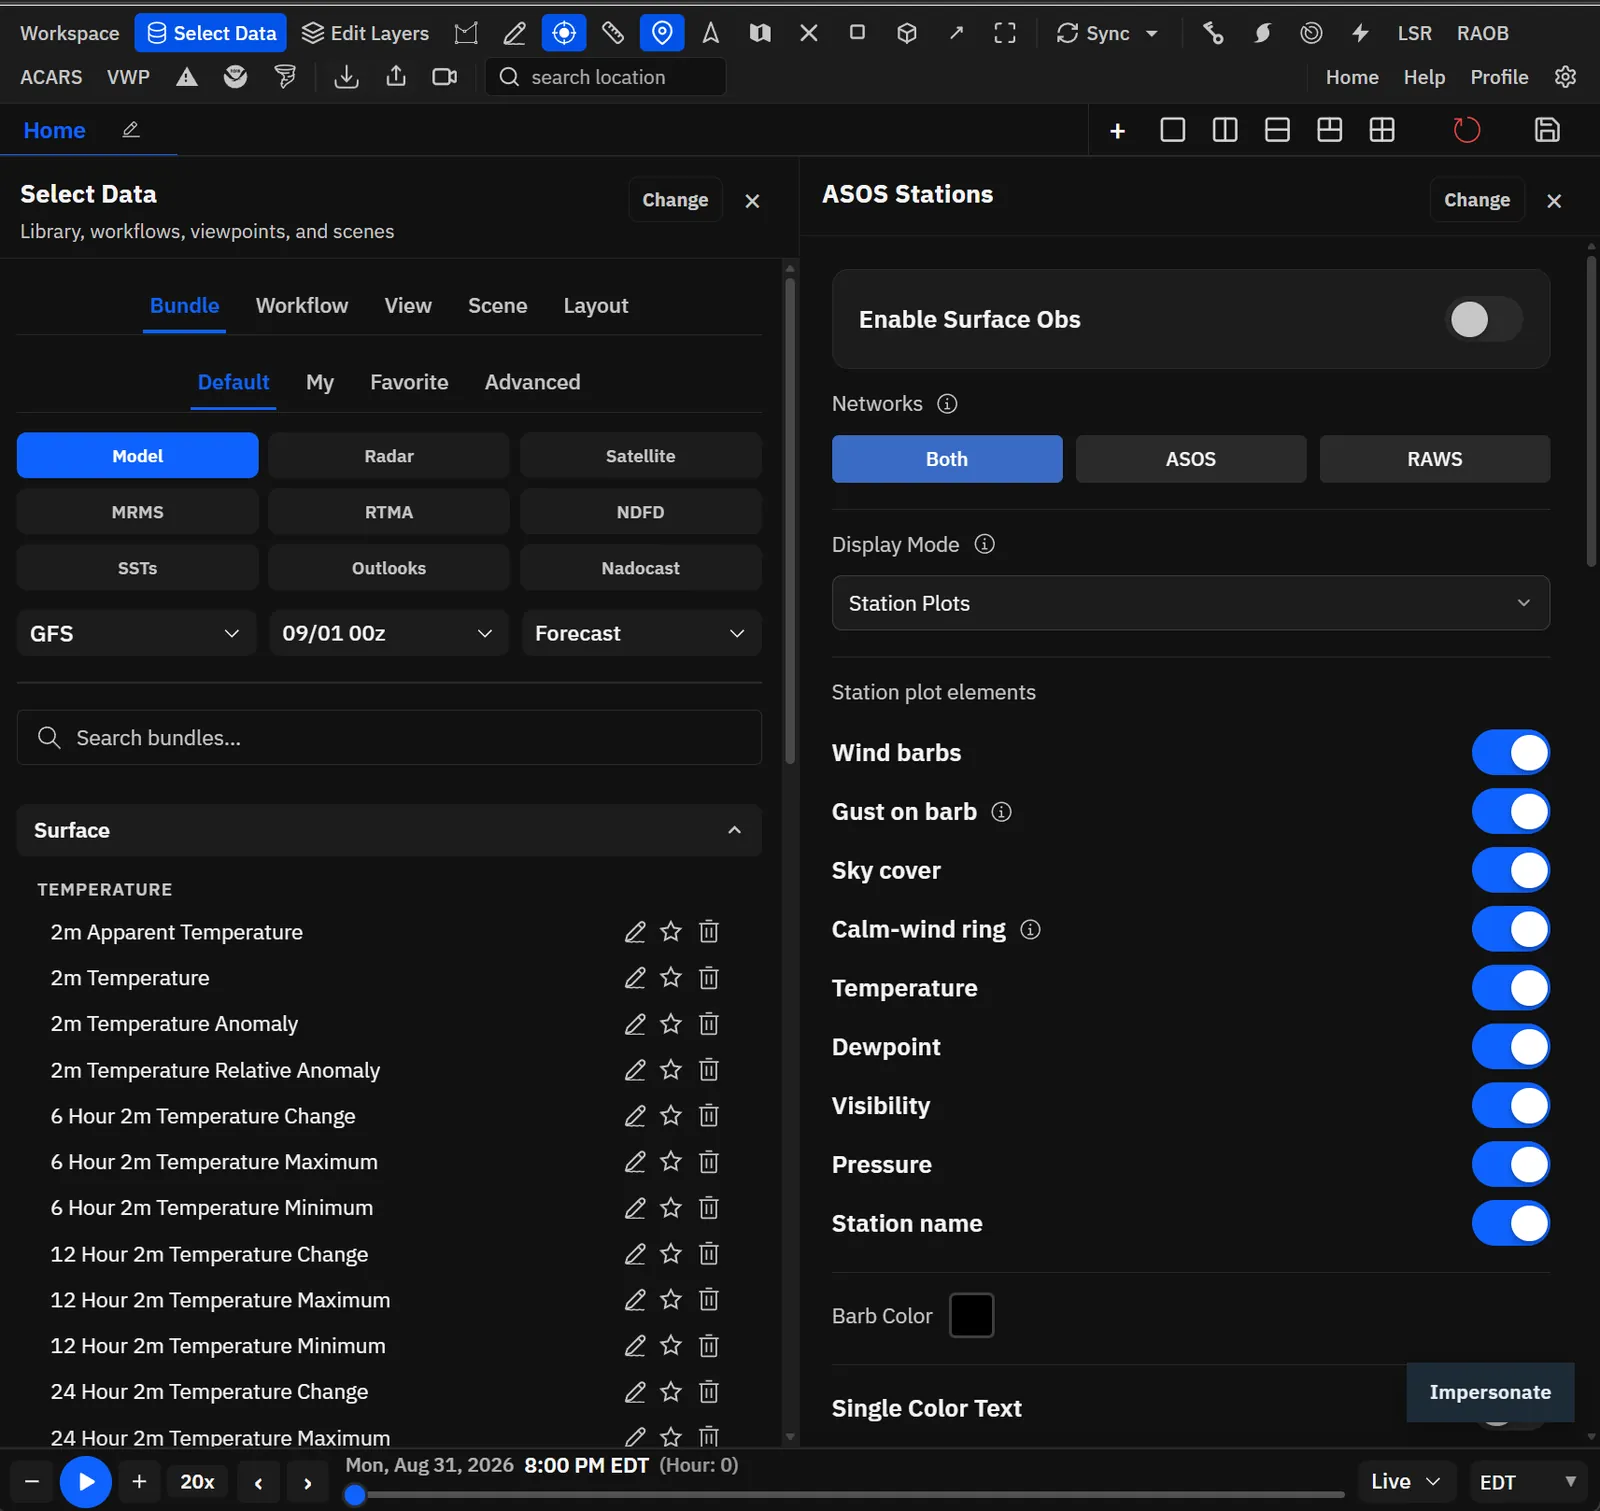
Change any keyboard shortcut, pick which toolbar buttons show, and trim or reorder the right-click menu.
Show me in the app- Click Settings on the toolbar, then Keyboard shortcuts.
- Find the action, or type in Search all shortcuts….
- Click Change, then press the new key or combination.
- To show or hide toolbar buttons, open Toolbar and use Toolbar buttons.
- To edit the right-click menu, open Context menu. Turn items on or off and drag them into order.
Tips
- Reset all puts every shortcut back to its default.
- You can bind keys to your own bundles and workflows too.
- Help → Keyboard Shortcuts shows the full list.
Shortcuts
- Shift + drag
- Zoom to a box
- ← / → / ↑ / ↓
- Move the map
Settings
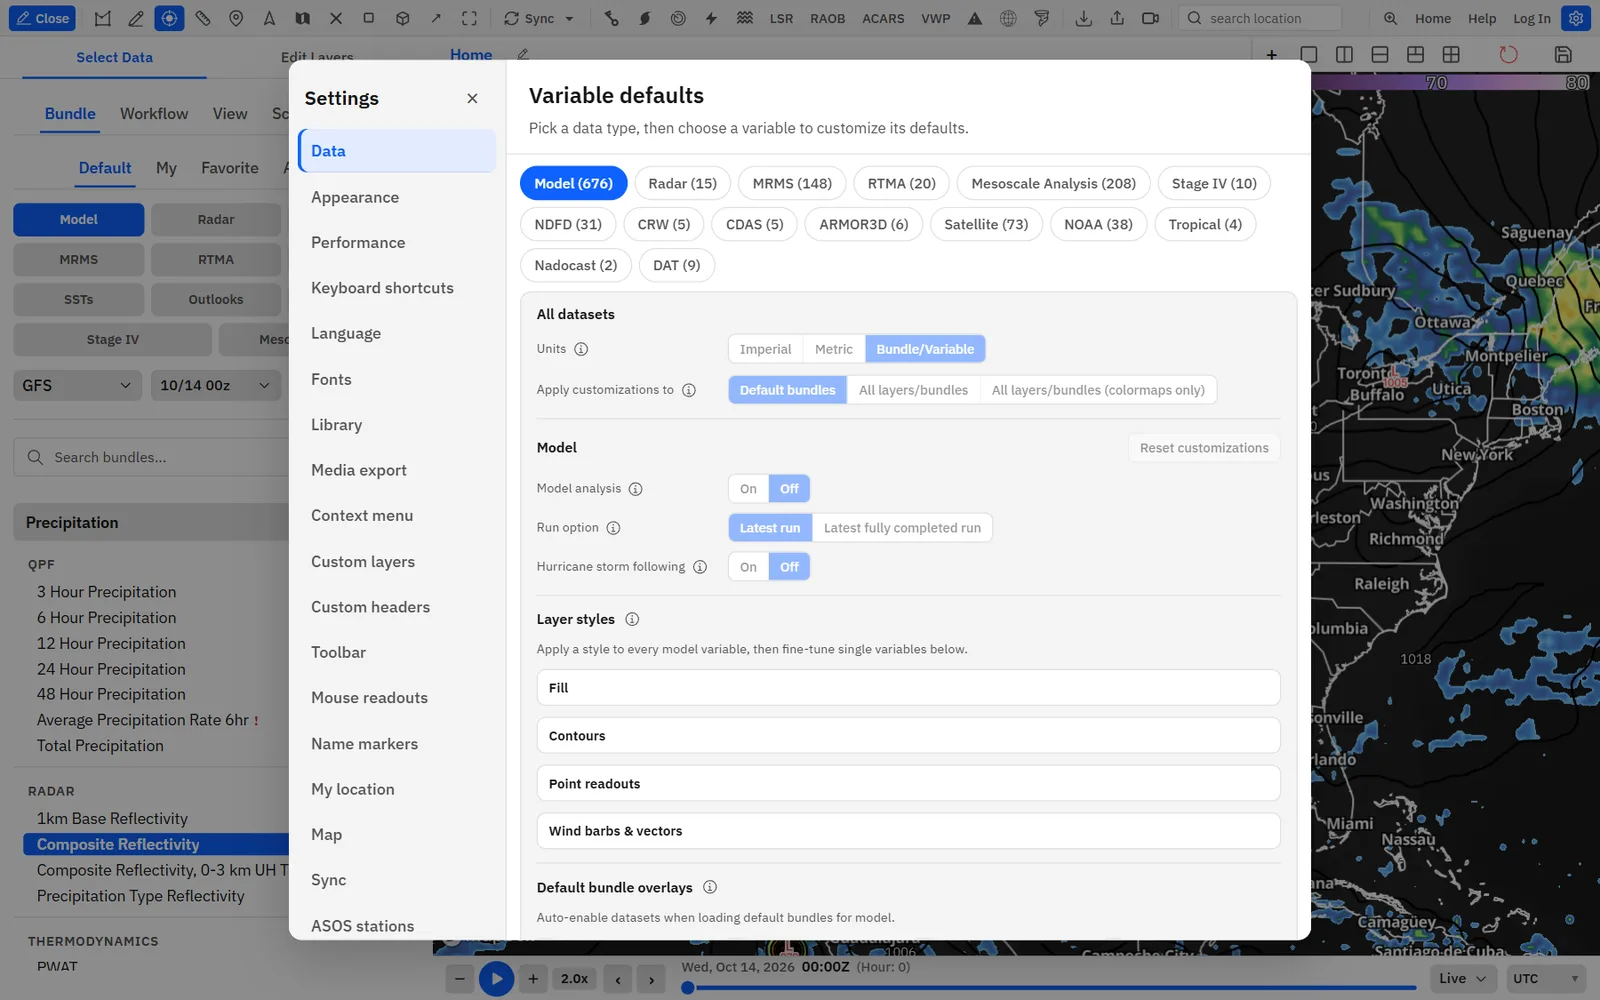
Units, language, performance, appearance and data defaults are all in one window.
Show me in the app- Click Settings at the right end of the toolbar.
- Pick a section in the list on the left.
- Change what you need. Changes save to your account when you are signed in.
Tips
- Data → Units switches between Imperial, Metric and Bundle/Variable.
- Language offers English, Spanish, French, Portuguese, German and Italian. Appearance has the light and dark theme.
- Performance offers Auto, Performance or Custom. The time zone menu is on the time bar.
Click-through tutorials
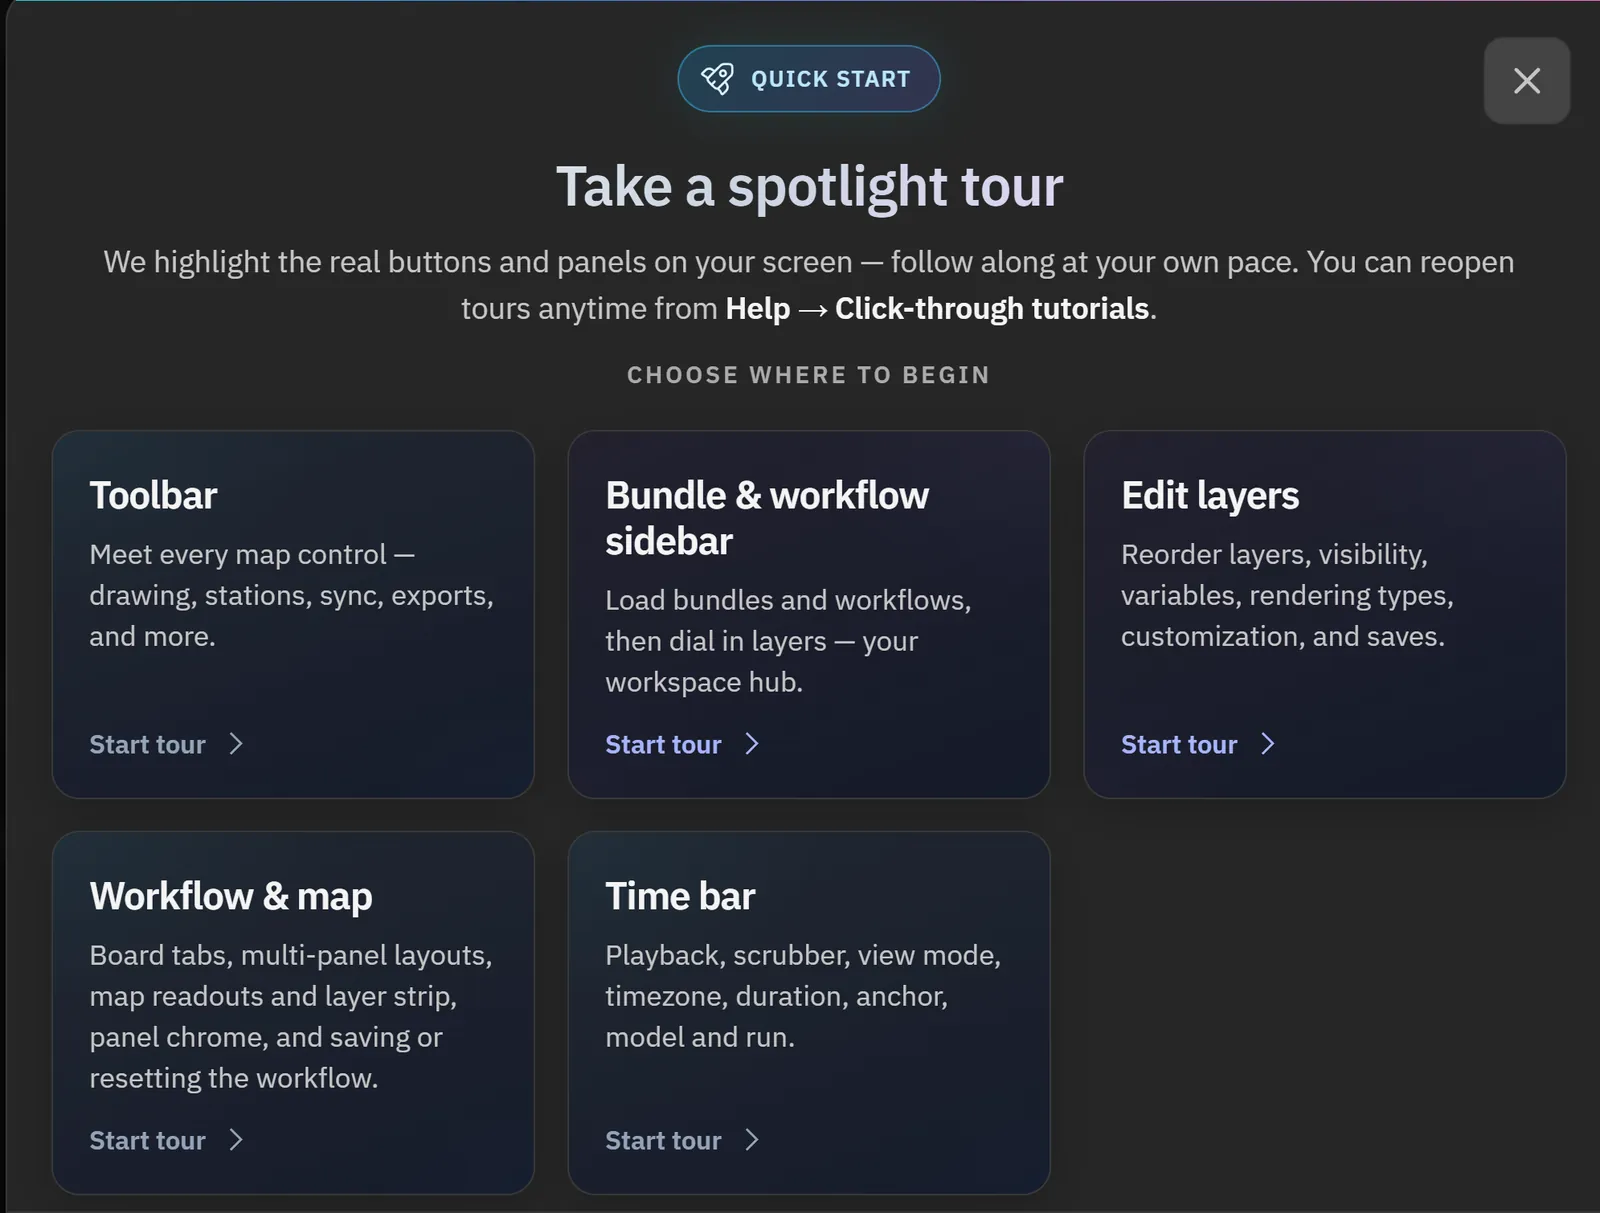
Guided tours highlight the real buttons on your screen and explain each one. Help also has FAQs and release notes.
Show me in the app- Click Help on the toolbar.
- Click Click-through tutorials….
- Under Choose where to begin, click a tour such as Sidebar or Time bar.
- Read each step and click Next. Click Finish on the last one.
Tips
- Help → FAQ explains bundles, workflows, layouts, scenes, archive mode and plans.
- Many settings have an info button that explains them.
- Press Esc to close a tour.
Find a feature
Search for any feature by name. The app highlights the button you need and lists the steps to use it.
Show me in the app- Click Find a feature (the magnifier with a sparkle) next to Home on the toolbar, or open Help and click Find a feature….
- Type what you are looking for, such as “3D radar”, “sounding” or “ticker”.
- Use ↑ and ↓ to pick a result and press Enter, or click it.
- The control lights up on screen with the steps next to it. Click Done or press Esc when you are finished.
Tips
- Open the full guide in the card takes you to that topic in this user guide.
- Help → User guides… lists every guide, with links to read it online or download the PDF.
- Don’t need the button? Hide it in Settings → Toolbar visibility.