Broadcast modeCreator
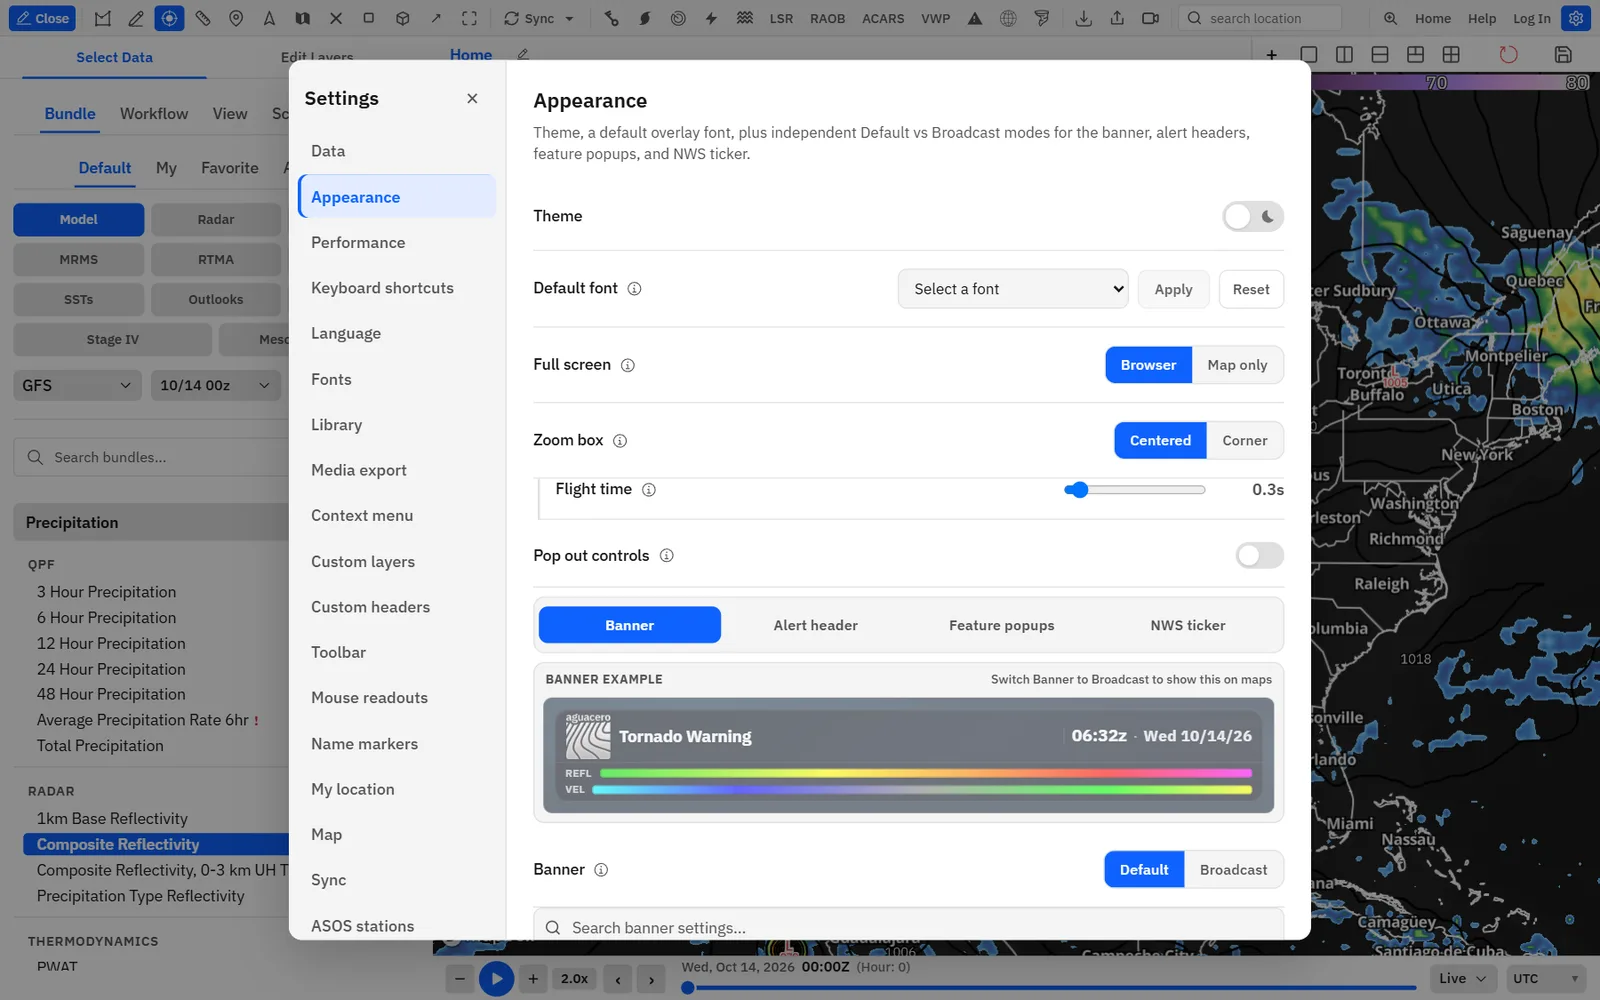
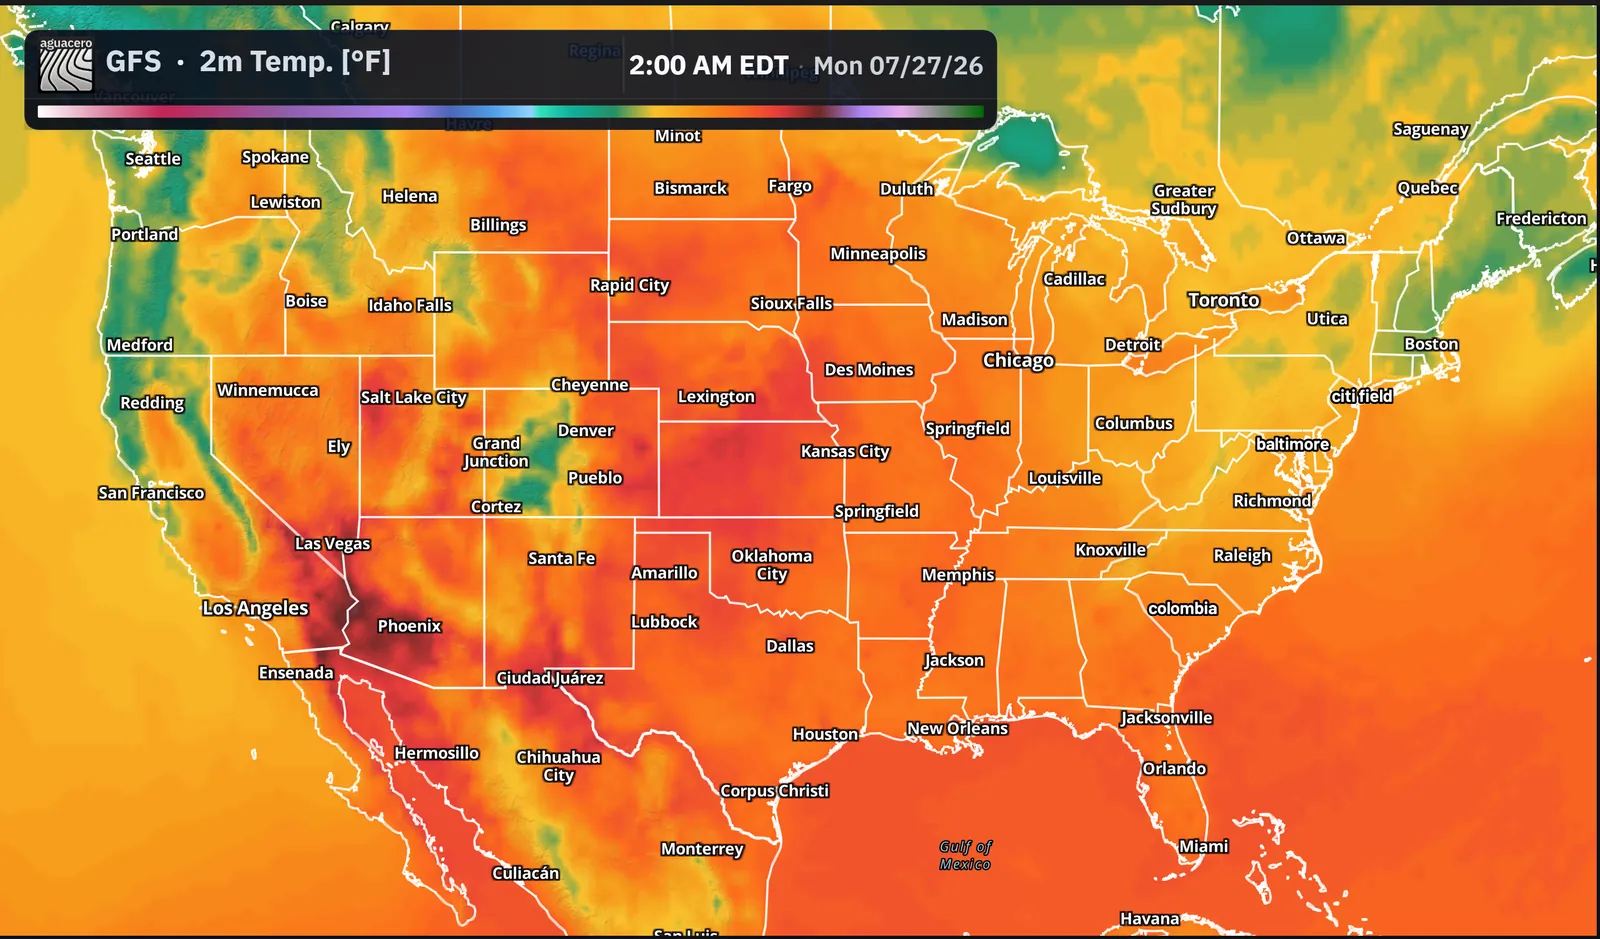
Broadcast mode swaps the usual map text for an on-air banner with your title, fonts, colors and logo, the valid time and the legend.
Show me in the app- Click Settings on the toolbar, then Appearance.
- On the Banner tab, click Broadcast next to Banner.
- Choose a Title: Default title, Custom title or Bundle title. With Custom title, double-click the banner on the map to type your own.
- Set the Font, Text color, Background color and Header layout.
- Under Broadcast banner logo, click Upload logo to add your own PNG.
- To keep this look, name it under Saved banners and click Save current.
Tips
- The banner, alert header, feature popups and ticker are set separately, so you can use any of them without the banner.
- In Broadcast mode the banner replaces the sidebar Layout tab and Custom Header layers.
Custom headersCreator
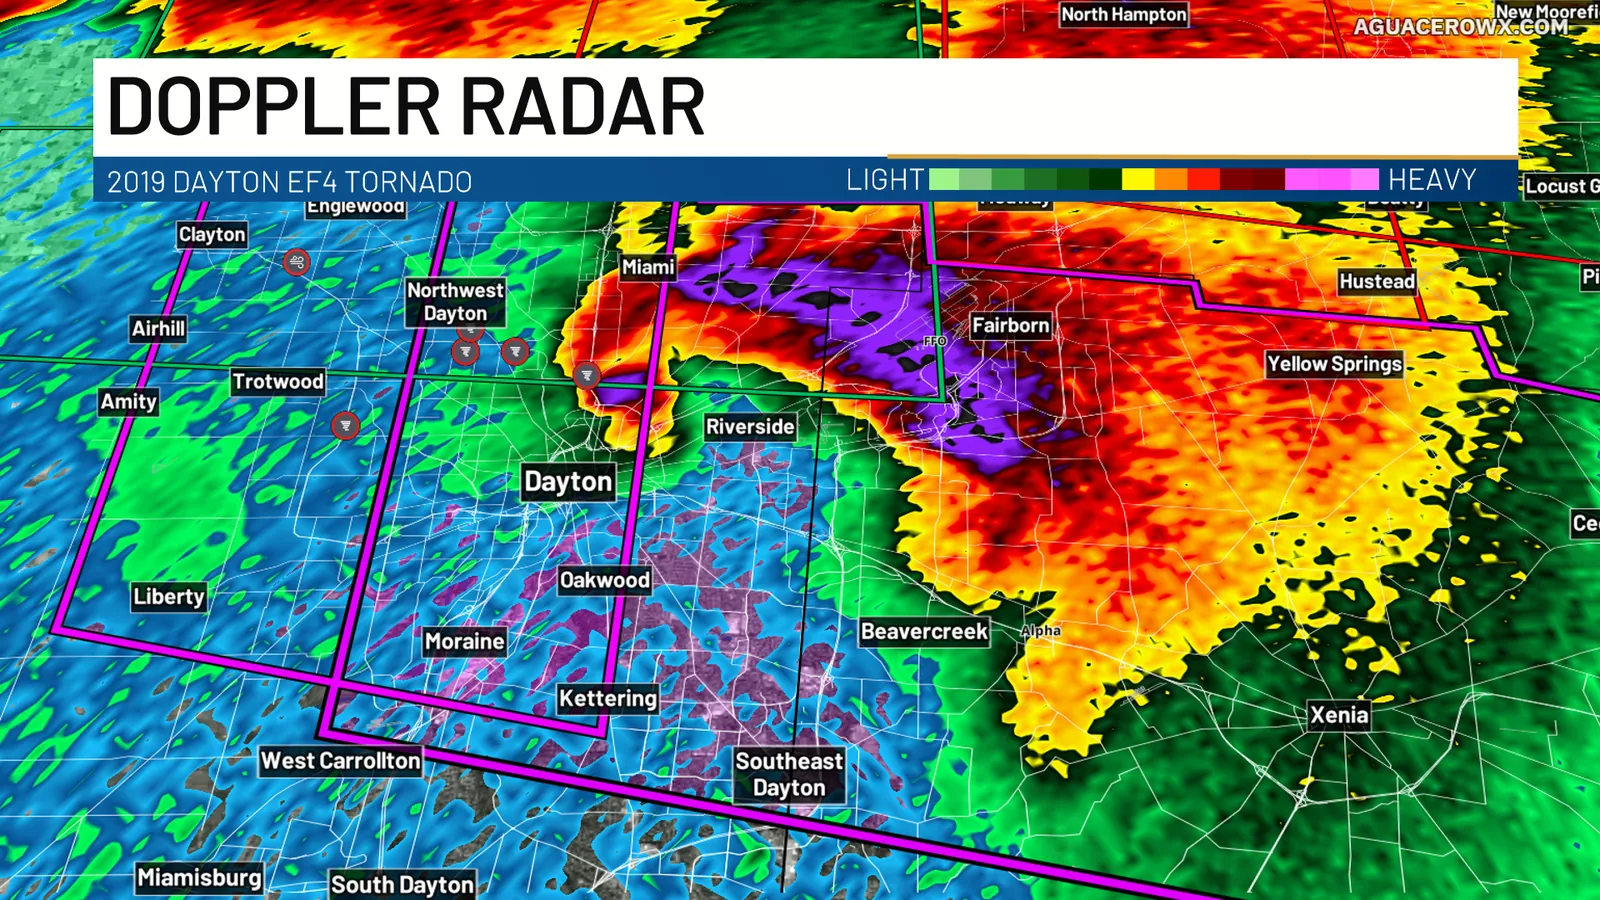
Upload your own upper thirds, logos and animated graphics, then place one or more on the map and add text to them.
Show me in the app- Click Settings on the toolbar, then Custom headers.
- Drop a PNG, JPEG, WebP, GIF, WebM or MP4 file on the upload area, or click browse.
- Give the header a name and click Save to library.
- In the sidebar, switch to Edit Layers, click Add Layer, choose Custom Header and pick your header.
- Drag the header on the map to move it, or drag its corner and edge handles to resize it.
- To add text, open the header’s settings, turn on Show text on this header and type, or double-click the text on the map.
Tips
- GIF, WebP and video headers play on the map.
- You can also add headers in the Layout tab and to scene steps.
Needs Creator and a signed-in account. Not available while the banner is in Broadcast mode.
Alert headersCreator
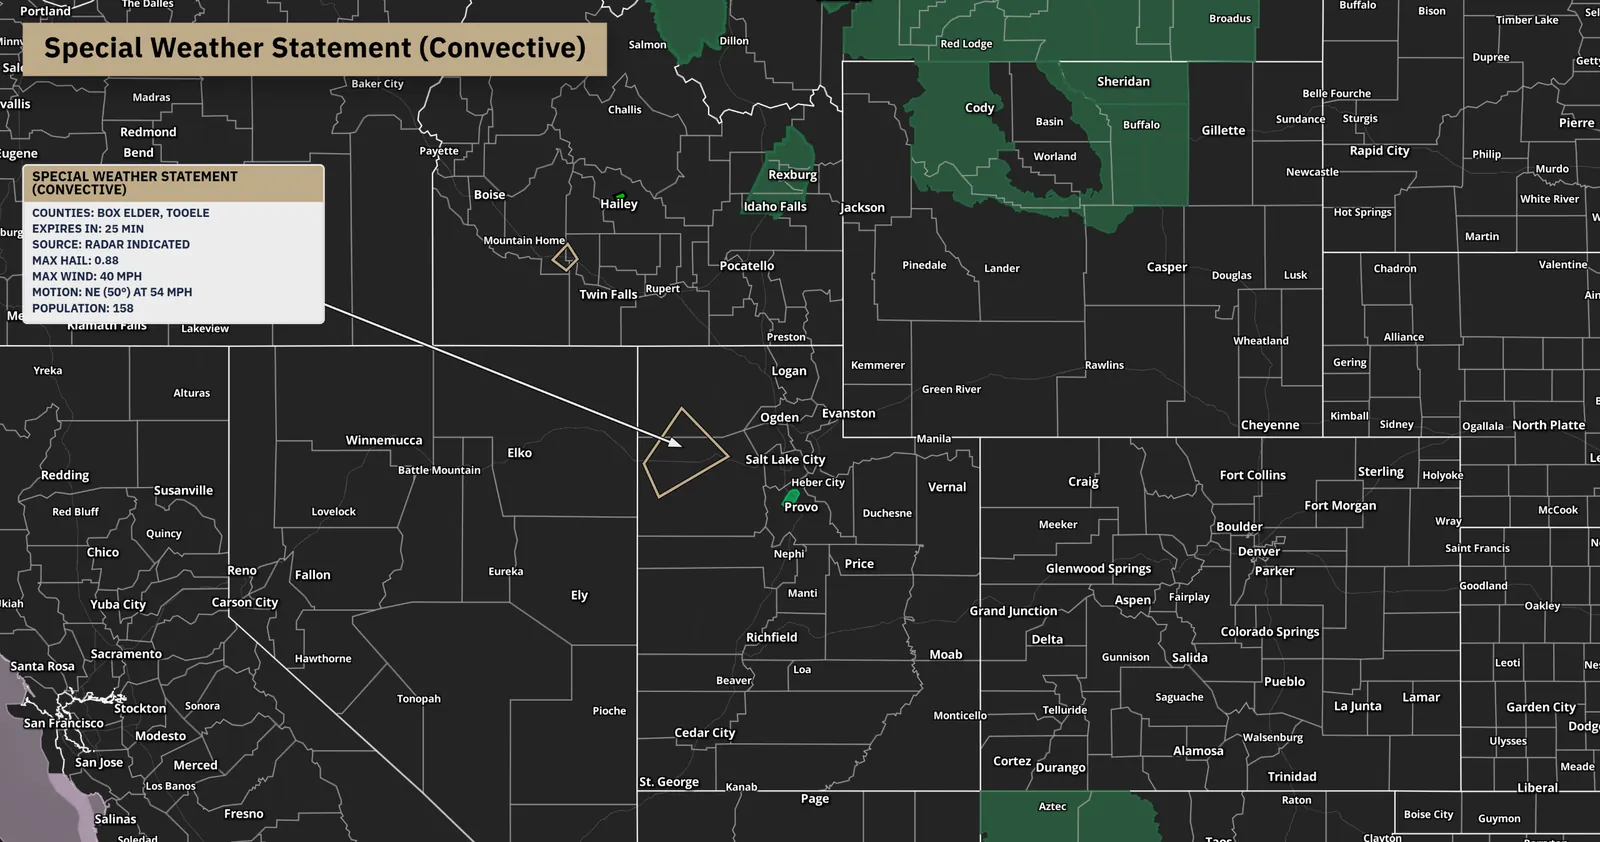
When you click a warning, hurricane cone or outlook, show its name as a TV-style title in the alert’s color.
Show me in the app- Click Settings on the toolbar, then Appearance.
- Open the Alert header tab and turn on Show alert header when an alert is selected.
- Under When an alert is selected, choose Separate header (a title you can drag) or Replace banner title.
- Style the text and background. Show severity keeps tags such as PDS or Emergency in the title.
- Click an NWS alert, hurricane cone or outlook on the map to show the header.
Tips
- Hide broadcast banner hides the banner while a separate alert header is showing. Header icon adds a PNG to the left of the title.
Needs Creator. Works with the banner in Default or Broadcast mode; with broadcast mode off, the separate header is used.
Alerts tickerCreator
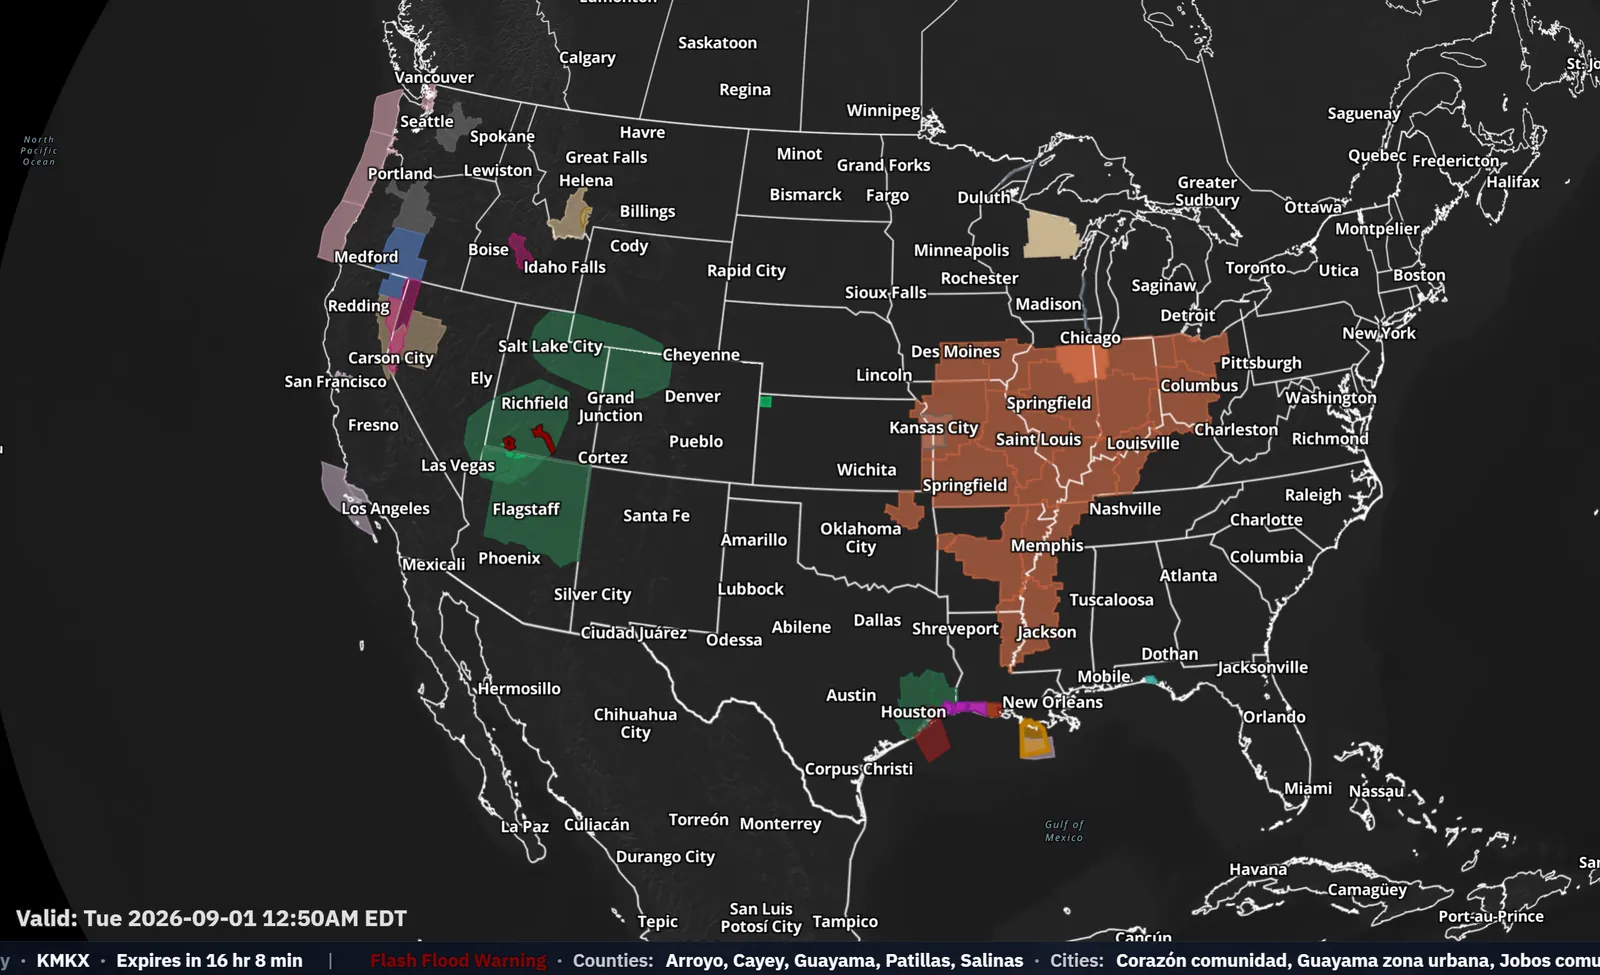
Run a TV-style crawl of active NWS alerts along the bottom or top of the screen.
Show me in the app- Click Settings on the toolbar, then Appearance.
- Open the NWS ticker tab and turn on Show alerts ticker.
- Set Position to Bottom or Top.
- Leave Sync with map on to match the map, or turn it off and pick a saved NWS alert bundle.
- Turn on Show clock or Show logo to add them to the crawl.
Needs Creator. To give the ticker its own mix of alerts, save an alert bundle from the Alerts toolbar menu first.
On-air popupsCreator
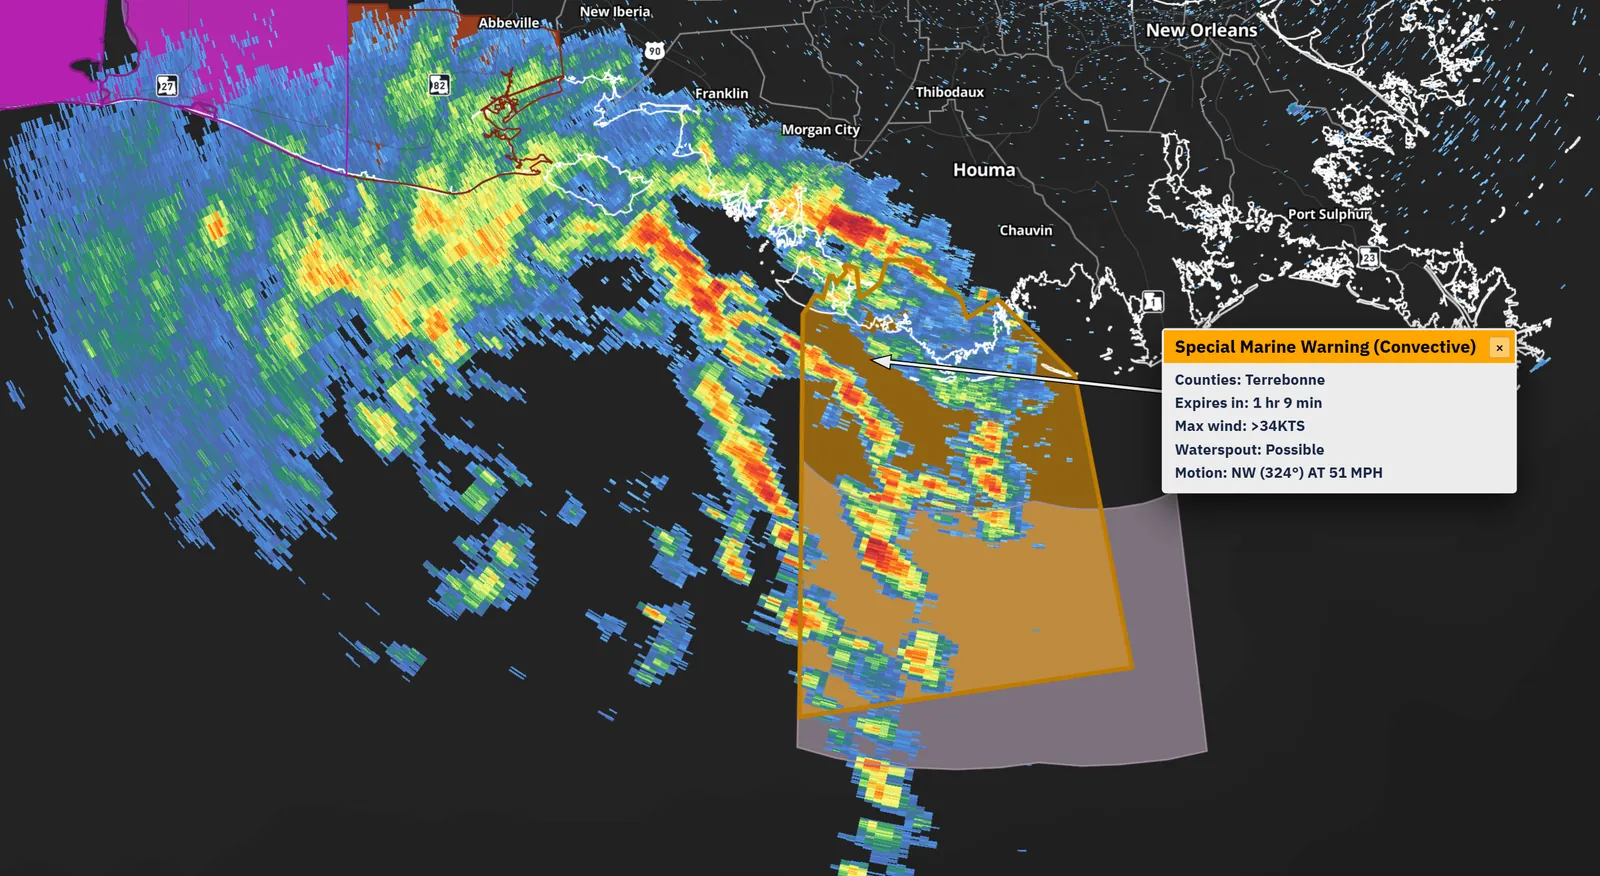
Show warning and feature details as on-air cards when you click them, and keep several on screen at once.
Show me in the app- Click Settings on the toolbar, then Appearance.
- Open the Feature popups tab.
- Pick a style: Default, Broadcast or Broadcast (Simple).
- Turn on Allow multiple popups to keep earlier popups open when you click another feature.
- Click a warning or other feature on the map to open its popup.
Tips
- Turn on Only show popup when clicking outline so clicks inside a warning do not open it.
Shortcuts
- PageUp / PageDown
- Step through overlapping features at the clicked spot (broadcast styles)
- Backspace
- Close the latest popup on the active panel
Viewpoints and toursCreator
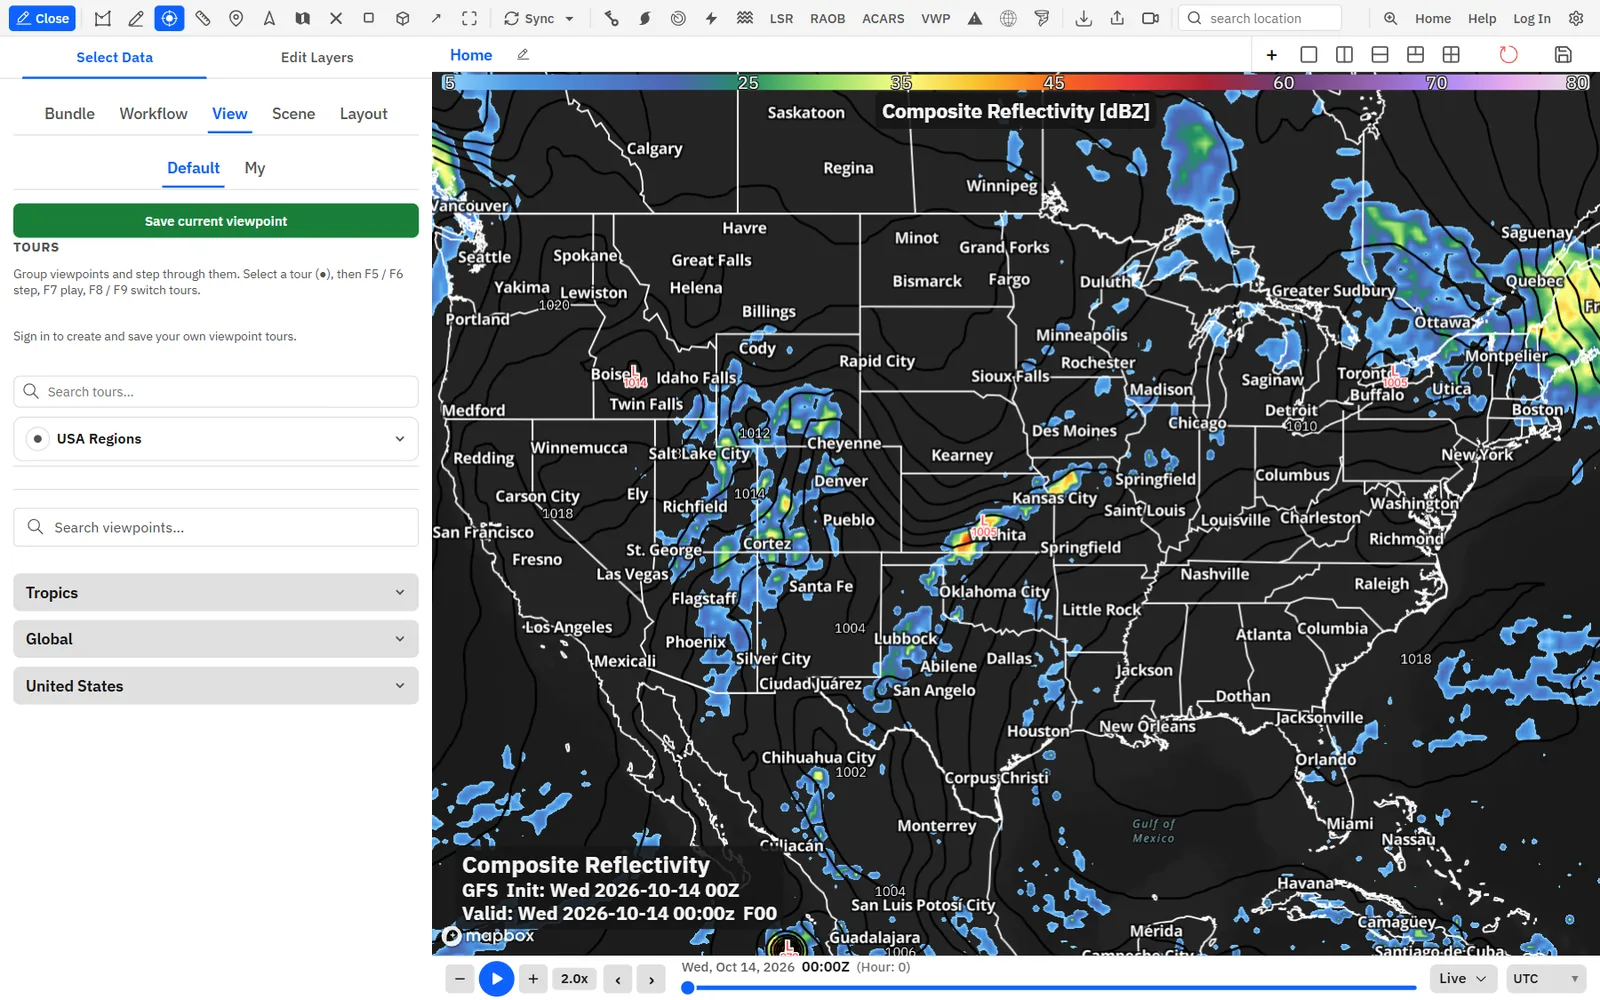
Save camera views, then string them into a tour that flies from one to the next. Play it live or export it as a video.
Show me in the app- Open the sidebar with Edit bundle or F1 and click the View tab.
- Move the map to the view you want, click Save current viewpoint, name it and save.
- Under Tours, click + New tour.
- Click Add steps, click + on each viewpoint in the list, then click Done adding.
- Click the dot (●) on the tour to select it for keyboard control.
- Click Play, or step with F5 and F6. Click Export to record the tour as a GIF or MP4.
Tips
- Set Fly duration and Switch to next step after on a tour to change its pace.
Shortcuts
- F5 / F6
- Previous or next step
- F7
- Play or pause
- F8 / F9
- Previous or next tour
Saving viewpoints needs a signed-in account. Tours and tour export need Creator. A tour needs at least two viewpoints to play or export.
ScenesCreator
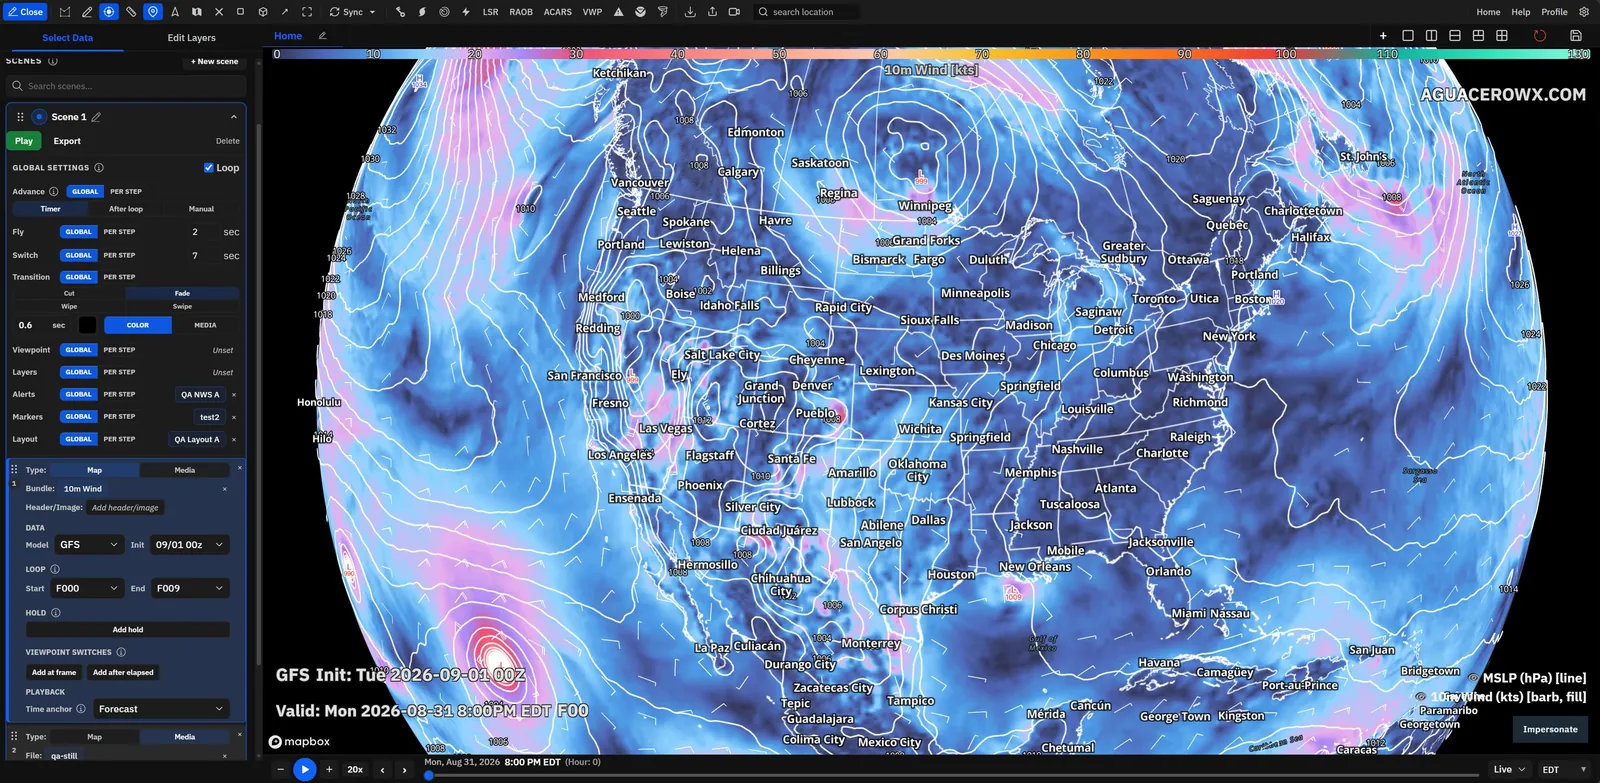
A scene is a step-by-step show. Each step can load a bundle or workflow, a viewpoint and headers, or show an image or video.
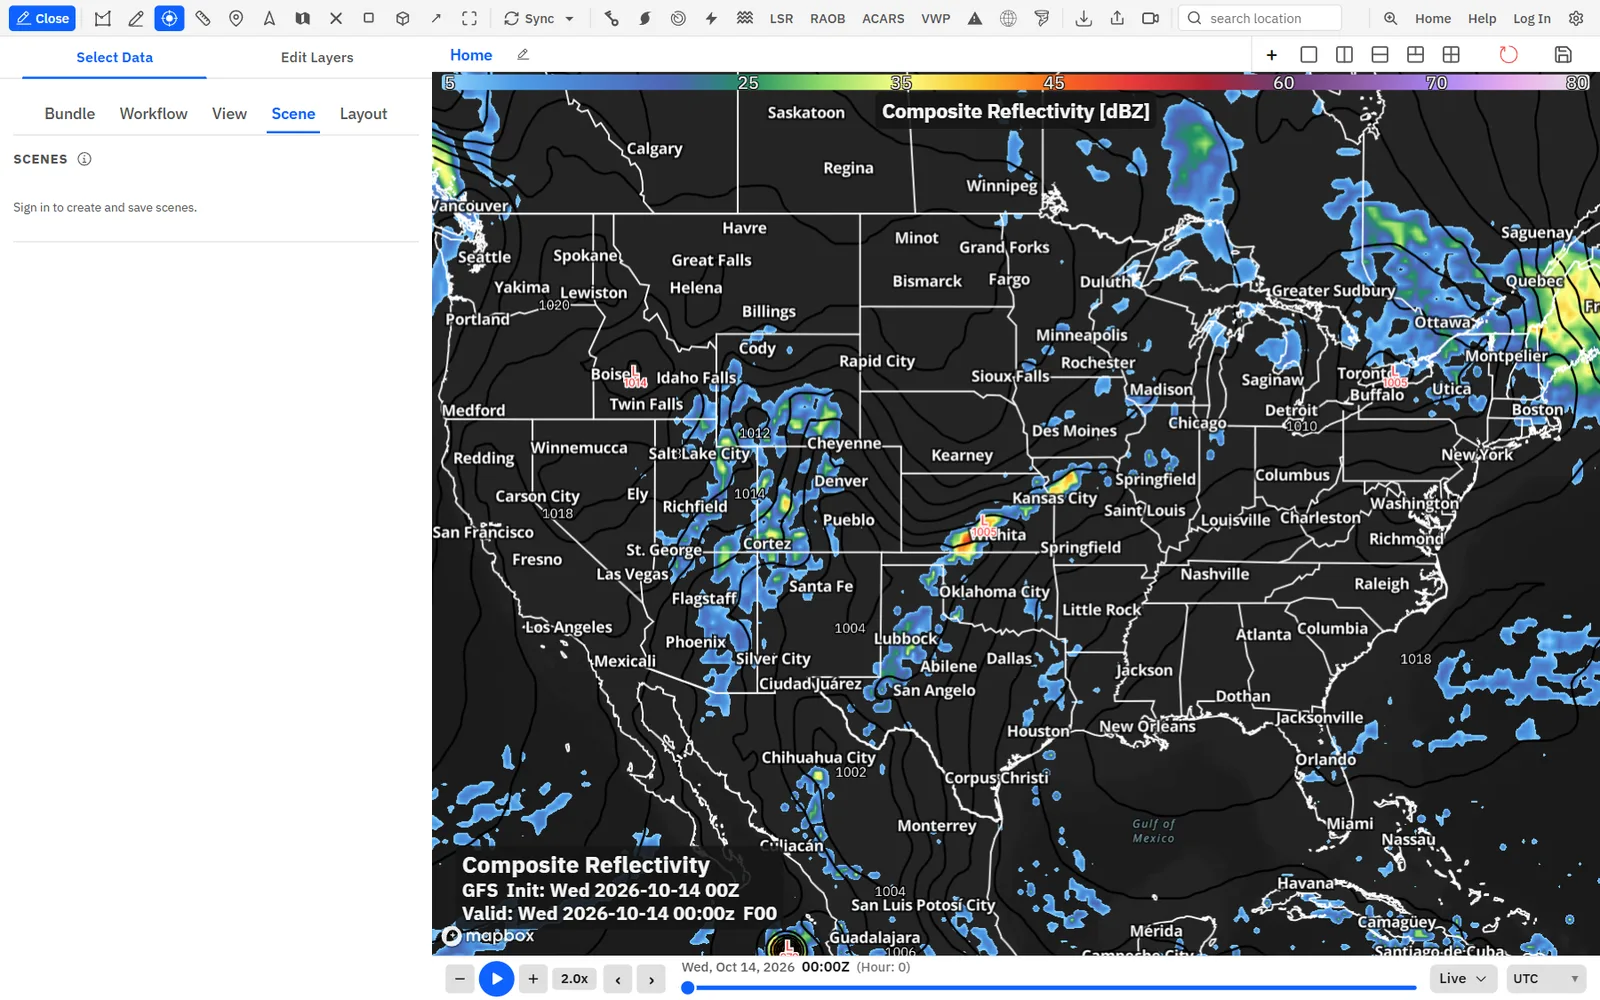
Show me in the app- Open the sidebar and click the Scene tab.
- Click + New scene. It starts with one empty step.
- Expand the step and use Add bundle, Add workflow or Add header/image. For a picture or video, set its type to Media and upload the file.
- Click + Add step for each part of your show.
- Under the scene’s Global settings, set Advance to Timer, After loop or Manual, and choose a Transition.
- Select the scene with its dot (●), then click Play or use F5, F6 and F7.
- Click Export to record the scene as a GIF or MP4.
Tips
- Expand a map step to set its time range, model run and radar sites. Add hold pauses the loop for a set time or Until click.
- Switch any row under Global settings to Per step to vary it by step. Hold and drag a scene or step to reorder it.
Shortcuts
- F5 / F6
- Previous or next step
- F7
- Play or pause
- F8 / F9
- Previous or next scene
- Space
- Continue after a hold, or go to the next step when Advance is Manual
Needs Creator and a signed-in account. Play and Export need at least two steps with content. Exports use the format set in Settings → Media export.
Layouts
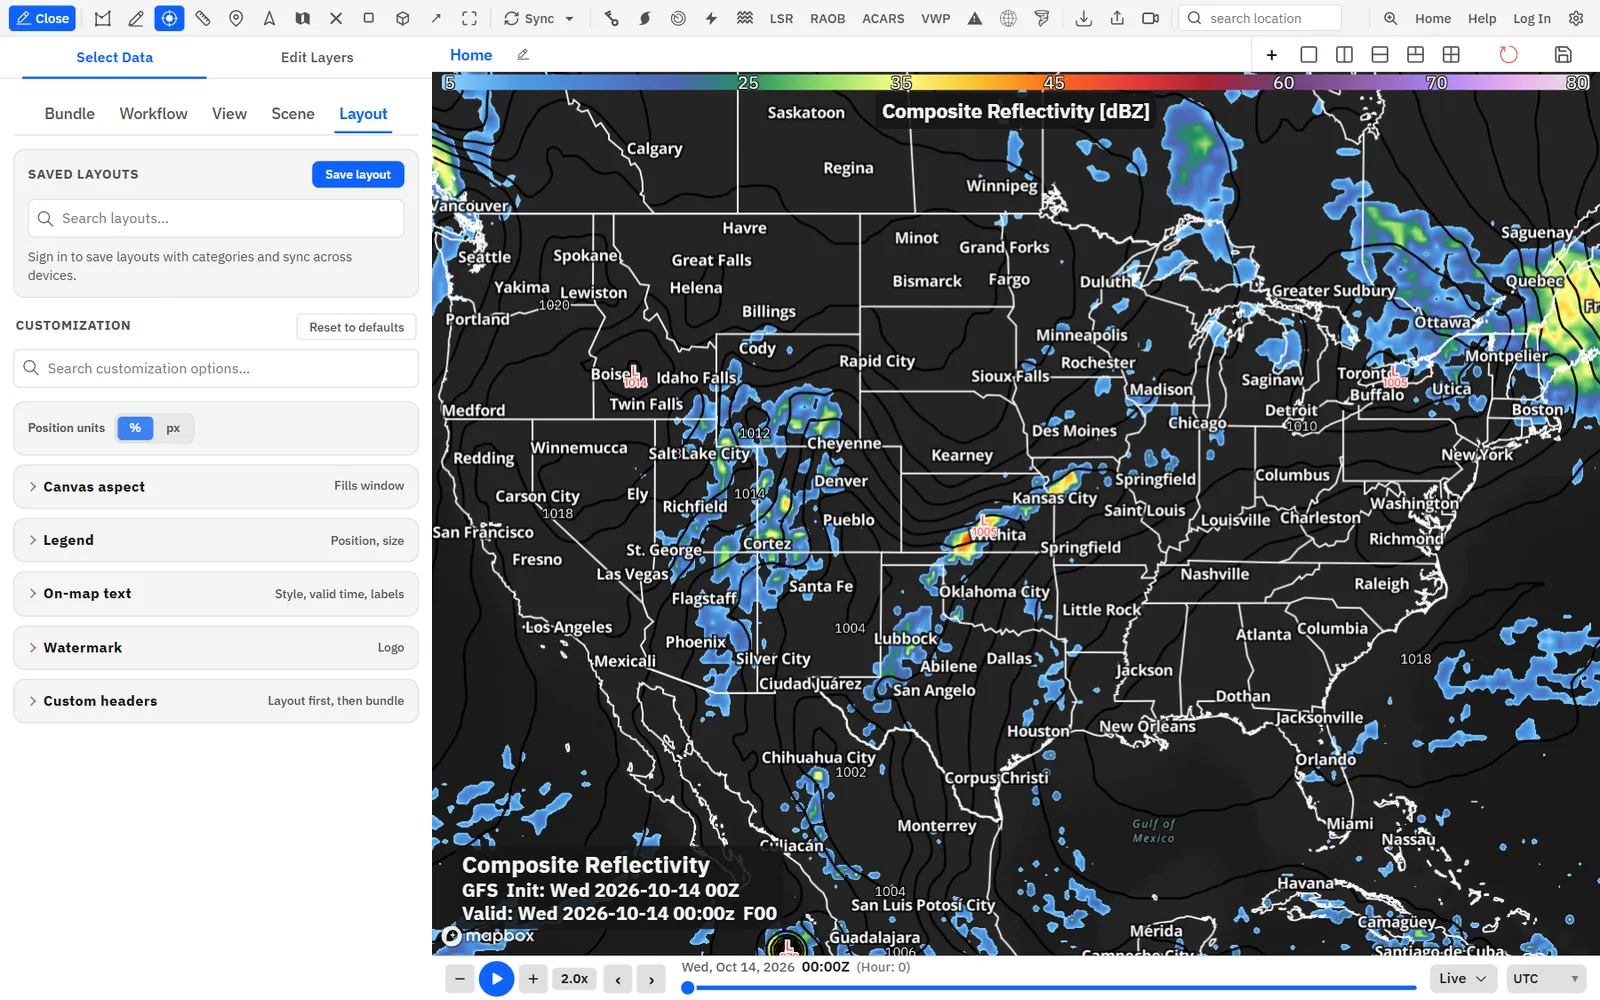
A layout sets the text drawn on the map: valid time, titles, layer labels, legends, the watermark and custom headers.
Show me in the app- Open the sidebar and click the Layout tab.
- Under Customization, open a section: Legend, On-map text, Watermark or Custom headers.
- Change what you need. The map updates as you go.
- Click Save layout and give it a name, category and subcategory.
- Click a layout under Saved layouts to apply it to the active board.
Tips
- Reset to defaults undoes every change. Update active layout with current settings saves changes to the layout you loaded.
- To keep a layout with a bundle, turn on Save layout to bundle when you save it.
Saving layouts needs a signed-in account, and custom headers need Creator. The Layout tab is unavailable while the banner is in Broadcast mode.
Canvas aspect ratio
Lock the live map to 16:9, 9:16 or another frame so screenshots, streams and exports match your other graphics.
Show me in the app- Click Settings on the toolbar, then Media export.
- Under Map canvas, pick a Canvas aspect: 16:9, 9:16, 4:3, 16:10, 3:2, 1:1, 21:9 or Custom.
- If you need exact pixels, set Resolution lock, for example 1080p for an OBS scene.
- Close Settings. The map is letterboxed to that frame, even with the sidebar open. Choose Off to undo it.
Tips
- The same control is in the Layout tab under Canvas aspect. A layout saved with an aspect switches the map back to it when loaded.
Floating board toolbarCreator
Put the toolbar on the board as a small panel you can drag, in place of the top toolbar. Settings calls it the popout toolbar.
Show me in the app- Click Settings on the toolbar, then Toolbar.
- Turn on Popout toolbar. The top toolbar is replaced by a toolbar on the board.
- Drag the grip on the popout toolbar to move it.
- Set Orientation (Horizontal or Vertical), Columns or Rows, Size, Background color and Icon color.
- Turn Popout toolbar off to bring back the top toolbar.
Needs Creator. It is not a separate window: it stays inside the board.
Radar drop shadowCreator
Add a hard black drop shadow under NEXRAD gates so the radar stands out from the basemap on air.
Show me in the app- Load a NEXRAD layer and open the sidebar on Edit Layers.
- Click Edit Layer on the radar layer.
- Tick Shadow.
- Set Shadow direction (0° puts the shadow at the top) and Shadow size.
Tips
- To turn it on for every radar product, open Settings → Data, choose the Radar tab and set Shadow to On.
Needs Creator.
No watermarkCommercial
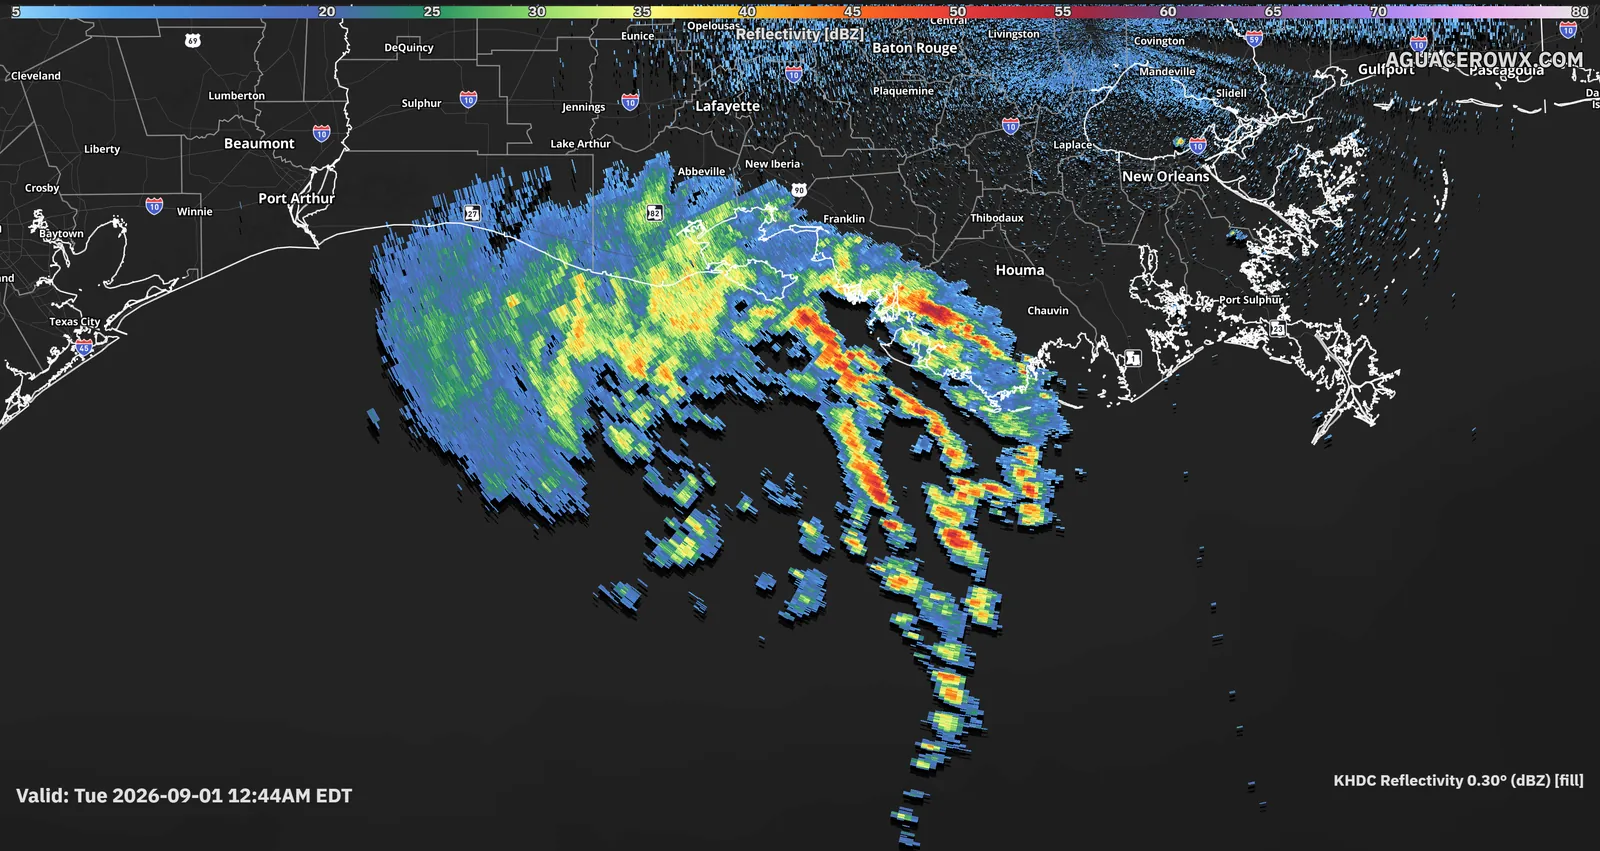
Commercial accounts can remove the AguaceroWx watermark and default logo from broadcast output and exports.
Show me in the app- Click Settings on the toolbar, then Appearance.
- On the Banner tab, turn off Show Aguacero logo. If you uploaded your own logo, turn off Show AguaceroWx watermark instead.
- In the sidebar Layout tab, open Watermark and turn off Show watermark.
On other plans these switches open a Commercial feature notice with an Email us button. Creator and University output keeps the watermark.