Download or share the board
Save the active board as an image, copy it, or send it straight to another app through your device’s share sheet.
Show me in the app- Set up the board the way you want it to look.
- Click Download board on the toolbar to save the image to your device.
- Or click Share board. When the image is ready, click Share to open your device’s share sheet, or Save to keep a copy.
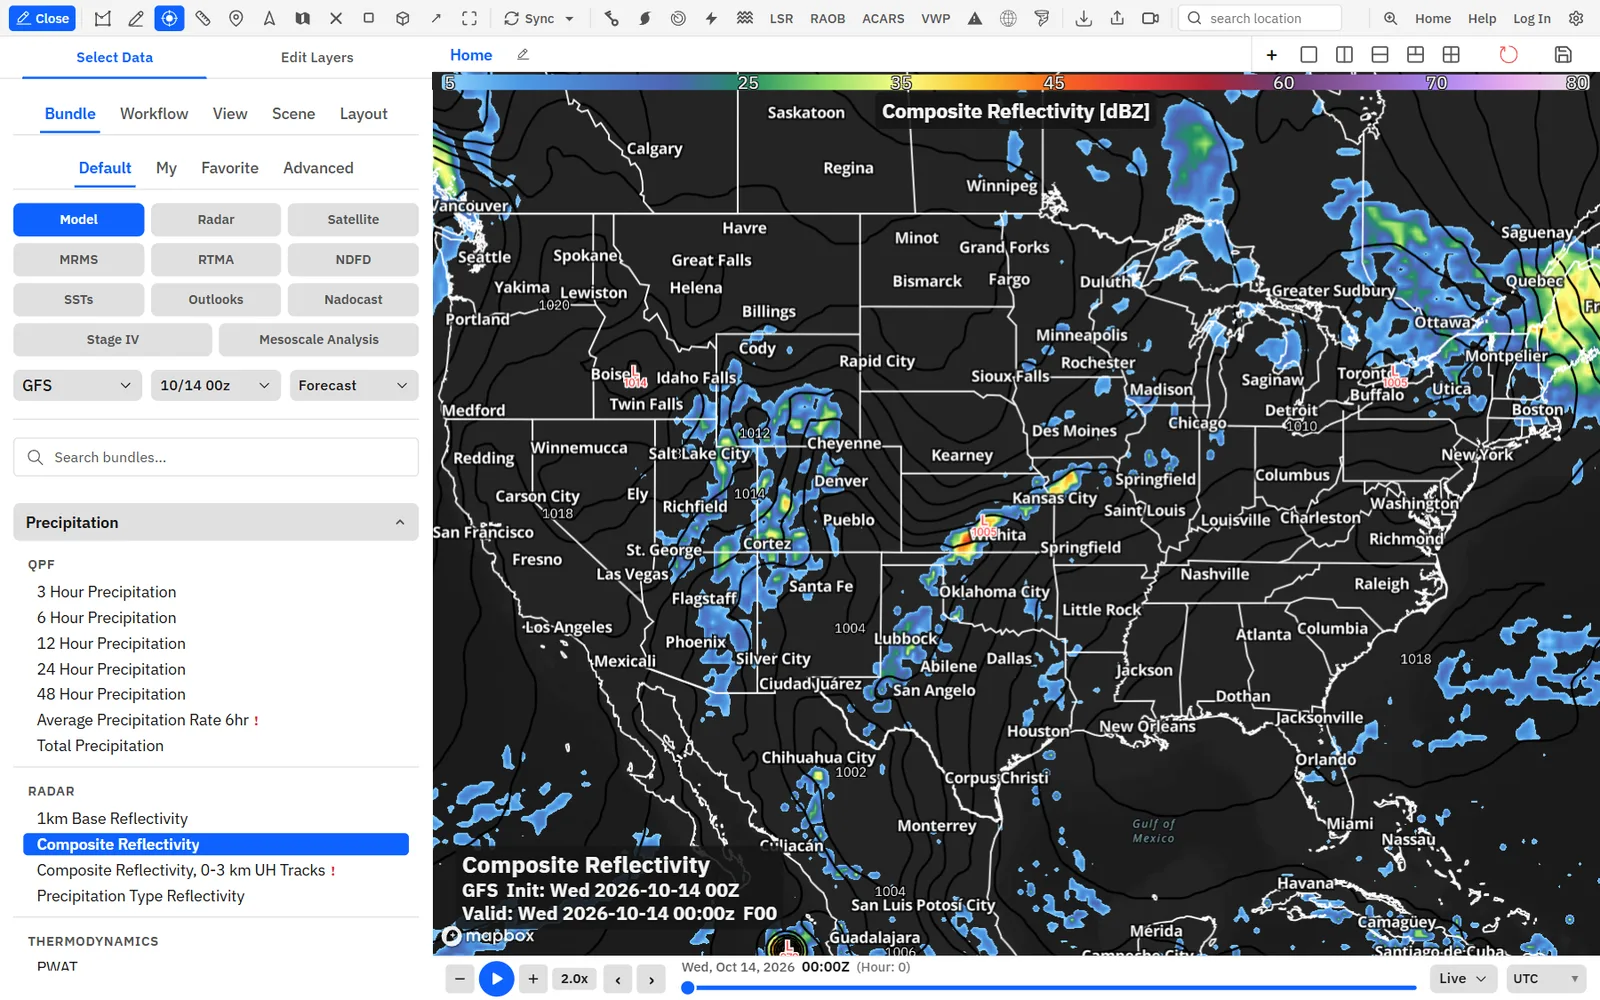
- To change the image format, resolution, quality or size cap, open Settings → Media export and look under Images.
Tips
- The image includes every visible panel on the board.
- Maps are drawn again at the resolution you set rather than screenshotted, so text stays sharp. Images save as PNG, JPG or WebP. Copy always uses PNG.
Shortcuts
- Ctrl + Shift + D
- Download the board image
- Ctrl + Shift + C
- Copy the board image to the clipboard
- Ctrl + Shift + S
- Share the board image
GIF and MP4 animations
Turn the times on the time bar into an MP4 or GIF loop at the size and quality you choose.
Show me in the app- Load the data you want to animate and let its frames load on the time bar.
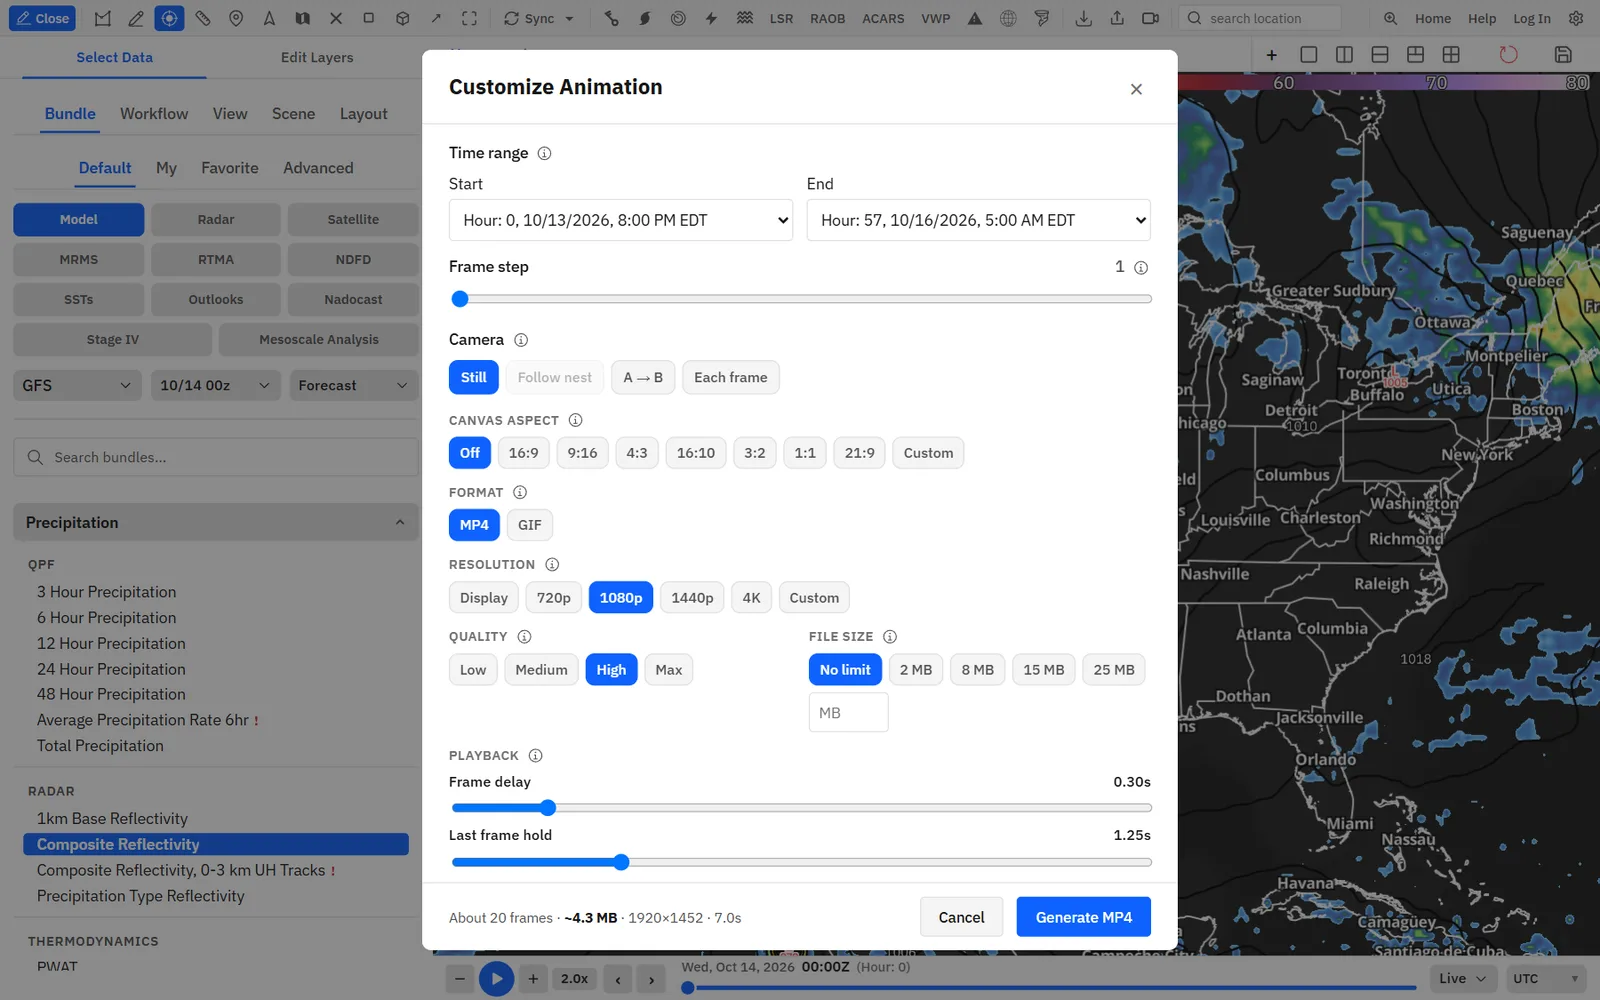
- Click Export animation on the toolbar. The Customize Animation dialog opens.
- Under Time range, set Start and End. Raise Frame step to skip times and make a smaller file.
- Check the Format (MP4 or GIF), Resolution, Quality and File size.
- Click Generate MP4 (or Generate GIF) and keep the window open until it finishes.
- When the file is ready, click Share or Save.
Tips
- MP4 is smaller and sharper for social posts. GIF helps where video uploads are blocked.
- File size is a cap. Typical limits are about 8 to 10 MB for Discord and about 15 MB for autoplay on X.
- Frame delay sets how long each frame stays on screen, and Last frame hold pauses on the final time before the loop restarts.
Shortcuts
- Ctrl + Shift + G
- Open the animation export dialog
Set your usual format, resolution and quality once in Settings → Media export under Videos. The dialog starts from those.
Storm-following video
Make an animation where the camera moves: pan along a line you draw, set the center of each frame, or keep a hurricane model’s nest centered.
Show me in the app- Click Export animation on the toolbar and set the time range.
- Under Camera, choose A → B to pan along a line, Each frame to set every frame’s center, or Follow nest to keep an HWRF, HAFS or HMON nest centered.
- For Follow nest, click Generate MP4 (or Generate GIF). For the other two, click Set camera · MP4 (or Set camera · GIF).
- For A → B, drag on the map from the start point to the end point. You can also pan the map and press Enter to use its center.
- For Each frame, click the map to set the center of each frame in turn. Use current center and Same as last save clicks.
- The export starts once the camera is set. Zoom and bearing stay as you set them.
Tips
- Follow nest needs an HWRF, HAFS or HMON layer on the map. It is on by default for those models; change it under Storm-following camera in Settings → Media export.
Camera paths are not available in Compare view.